Willow
Who couldn't love patterns named after Buffy the Vampire slayer characters? You can never watch that show too much; I frequently find myself losing hours at a time crocheting and watching it on TV. Willow is the character I identify with most too - she works hard, she's bright, but she's not all sweetness and light.
I crocheted the Willow (Doily Blanket) by Lisa Gutierrez as a goodbye present for a friend who was moving to London. I had had my eye on the pattern for a while, and I was really pleased to have a reason to make it, but sorry that I was losing a friend to the Big Smoke.
Making this pattern lived up to my expectations. It was the first time I'd done anything really lacy - I find the idea of crocheting with cotton and tiny hooks intimidating, though I do now have a 1mm hook so maybe I will try one of these days. I really enjoyed the way that every row added something new to the design. It was mostly pretty easy to do but frustrating at times since because it's in rounds, so unless you're very careful (something which I try to be but fail at quite often) you only find the error you make a round later, leading to a lot of frogging and re-doing, especially towards the end.
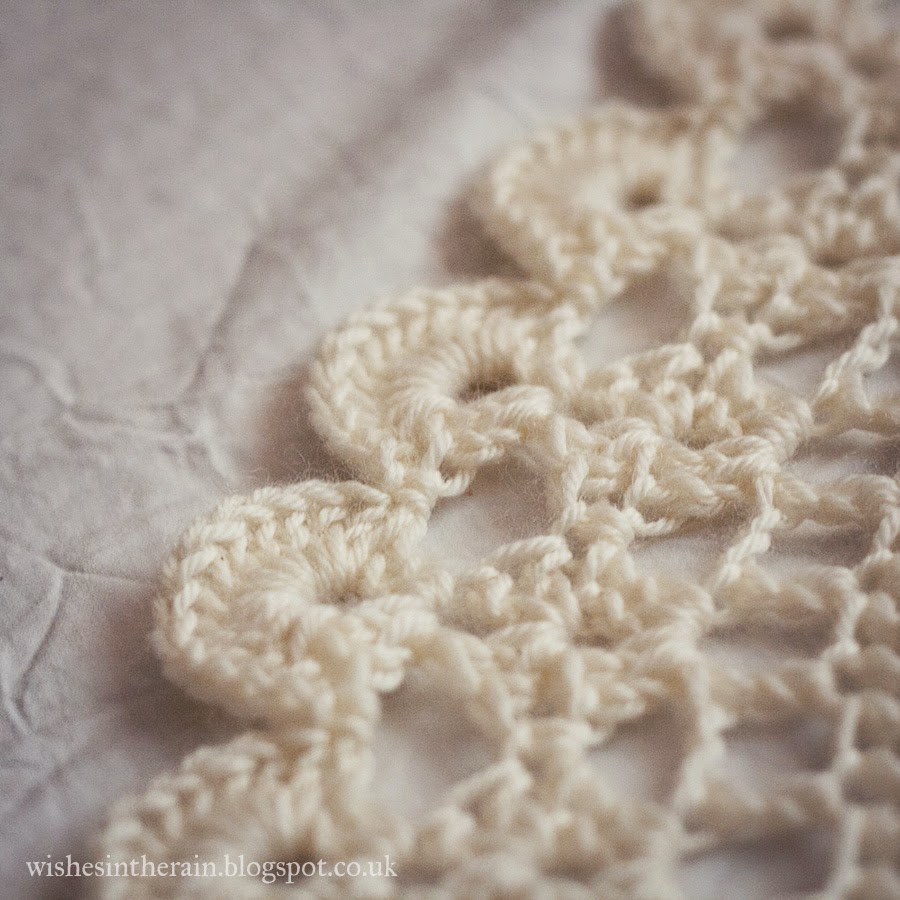
The edging on this throw was so pretty, even though it took a long time to do - there are a lot of stitches there. Circular things always start really quickly but the last rounds can seem endless. But this pattern really held my attention to the end.
The only sad part about it was having to give it to someone I wasn't going to see for a long time. Still, there's always facebook.
You can see details about which yarn and hook I used on my Willow Project page on Ravelry.
Anya Throw
After making the Willow throw, I was looking for an opportunity to make the Anya throw by the same designer. I really wanted to make them for my own home, but my two cats made me think that this would be a terrible idea. They've ruined about five throws that I've bought so far with their little claws, and I know that they would probably destroy all my hard work. And it took forever for anyone I knew to move house! So frustrating. But finally a friend of mine moved out of a flat into a house, so I immediately bought wool for a house-warming present.
Anya, probably true to the character on Buffy, was harder work! This throw is bigger, and therefore took longer than I was anticipating, since I had the memory of the fast progress I made on Willow in my mind. On the other hand, I think I made fewer mistakes on this one, so it was easier in that respect.
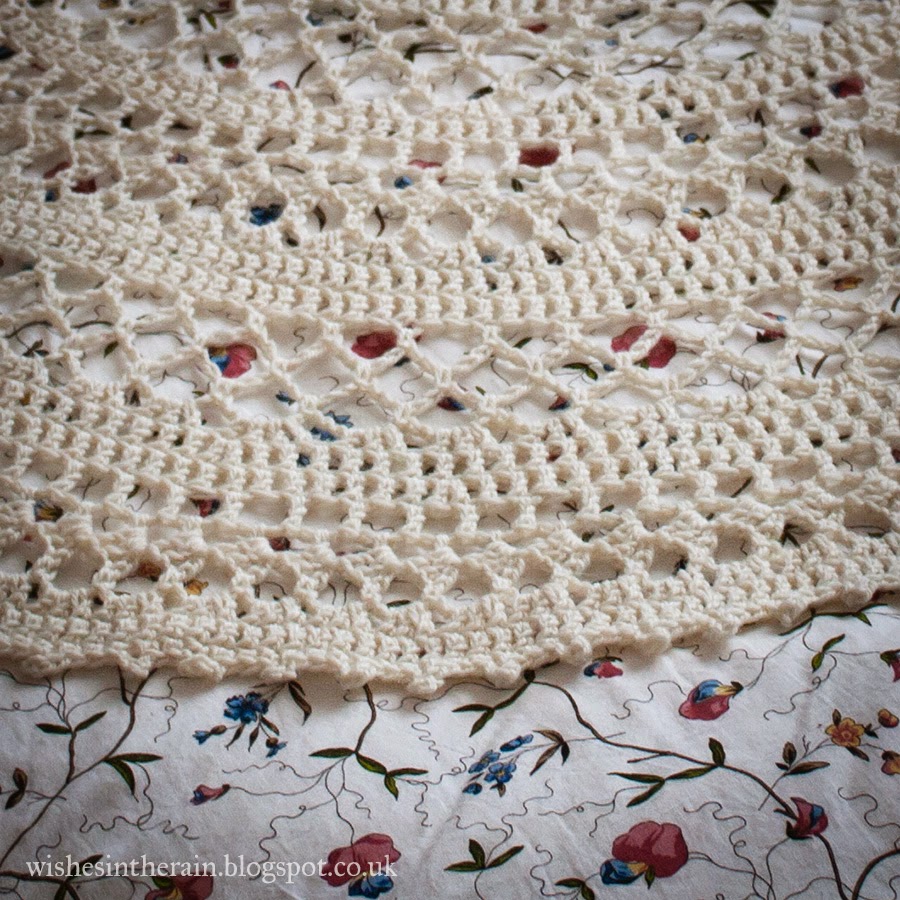
The edging on Anya is understated but elegant. I don't think you can really go wrong with picots.
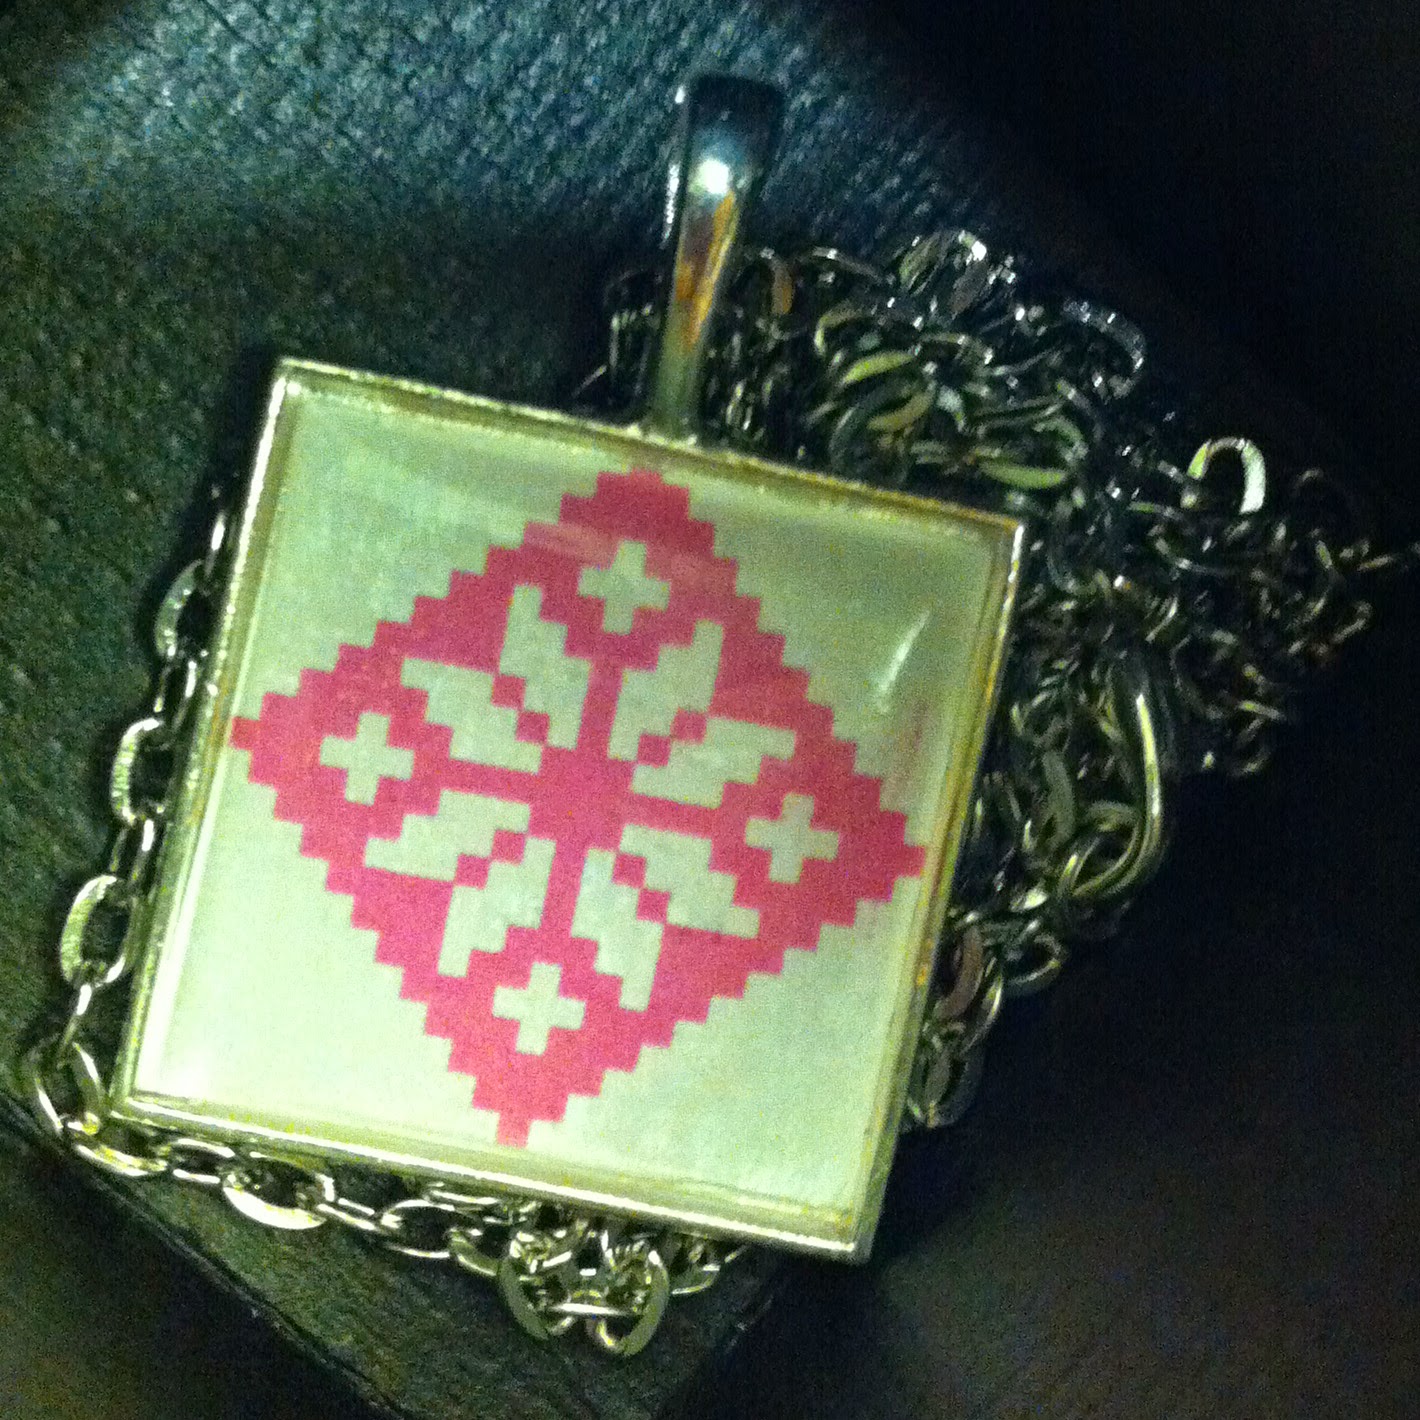
I wasn't sure what furniture belonged to my friend and what belonged to her flat when she moved, so I had no idea about her décor. So I was delighted by how happy she was with her throw, and how good the neutral cream colour looked on her dark blue sofa. One of these days I'm going to make a Willow throw to go on her other sofa!
Should I make one too? These make great gifts, but probably not if your recipients have pets. They also wouldn't go with a more modern décor, but they're pretty flexible other than that. Willow is quicker than Anya to make.
Friday, 6 March 2015
Saturday, 7 February 2015
What I Made: Hungry Caterpillar/Butterfly
![]() |
| Hungry Caterpillar |
![]() |
| Caterpillar's under side |
![]() |
| Metamorphasis |
![]() |
| butterfly underside |
![]() |
| butterfly! |
I would definitely make one of these as a gift in the future, though maybe for a slightly older child who has enough finger strength to turn it inside out themselves
Should I make one too? Yes! It's a lovely idea regardless of colours, and if you have a Hungry Caterpillar fan in your life you have to make one for them.
Labels:
amigurumi,
crochet,
gift,
toy,
tried and tested,
what i made
Monday, 21 July 2014
What I Made: kawaii octopus
![]() |
| octopus! |
![]() |
| octopus met his new owner at church |
Making the legs were a bit tricky but the photos in the pattern are really helpful. Overall, though, I was really pleased by how quick it was to make. So easy in fact that I made another - this is rare for me because normally I'm all about the new shiny!
![]() |
| little octopus |
The second one I made was much smaller - I made him with a 2.5mm hook and DMC Natura Cotton which is 4 ply weight, and my new 3mm safety eyes that my friend UnicornReality kindly sent me. Then I saw the Baby Kawaii Octopus pattern.
![]() |
| little octopus and tiny baby octopus, with 10p for reference |
Should I make one too? Yes, especially if you need to make a last minute gift for a young child, but bear in mind, safety eyes are probably not safe for children under 3 unless you know they will be closely supervised when playing with the toy.
Labels:
amigurumi,
craft,
crochet,
toy,
tried and tested,
what i made
Sunday, 20 July 2014
What I Made: epoxy sticker pendants
I love making jewellery, and a while ago I experimented with making pendants with epoxy stickers and pendant trays from www.jasminestudiocrafts.com. I bought them because I thought it would be fun to make jewellery with my art in it, but these are just practice attempts, the outer two with cardstock, and the inner one with thin cotton fabric from a dress I made for my niece.
The card was too thick and textured, really, to work well with the stickers, and it was really really difficult to cut in curves! But they're pretty as long as you don't study too too closely.
I was really pleased with the way the middle one turned out - I didn't know what to expect with gluing the fabric because I'd never used Mod Podge with fabric before, but it worked really well!
Later, I thought it would be really nice to try this with children, particularly the children at my church Holy Innocents Fallowfield, as a chance for them to make a few Christmas presents. I got some dark coloured card, some metallic gel pens, and some Christmas wrapping paper. I also got some little boxes to put them in for gifts. Here are some not particularly good pictures of the results:
The girls had a lot of fun, and I think they were pleased with the results too. They made two or three each in the space of about half an hour. The older girls (I'm not sure of their exact ages but they're all in primary school) were able to do the whole thing by themselves, and I helped the slightly younger ones out by cutting the card to size for the pendants after they'd stuck the stickers on.
Should I make some too? Yes. It can be a bit of a gateway
What I Made: Autumn Flowers Shawl
I started off in cream but pretty quickly decided that the fingering weight yarn was too light, even though that's what others had used to make the shawl, so I dragged my husband to the yarn store again and got some green Wendy merino DK.
The first part of the shawl was deceptively easy, and while it took me a couple of evenings to complete, I'm sure if I'd concentrated I could have done it quicker. I then blocked that part because the edges were curling over.
![]() |
| flowers detail |
The flowers were more difficult, however. I think this was partly because it used a stitch I wasn't used to, but also because the Party Angel yarn is hard to work with- it's really hard to unravel mistakes and, in the colour I used, even see the stitches. I did them over two evenings and most of the weekend. They were extremely pretty when done though.
![]() |
| edging detail |
This is a lovely shawl, and I've continued to wear it on and off for a couple of years now. I've had a lot of compliments on it! I'd like to make another at some point, though possibly using an easier to handle yarn for the flowers. It took a little longer than I thought it would, but by comparison to the other patterns I've tried it's pretty fast.
Should I make one too? Yes, especially if you want to give someone a unique and eye-catching gift, something a little different from the average handmade shawl.
Wednesday, 7 May 2014
It's ok to look down
![]() |
| such mobile. very phone. |
When I was a child, I was often lonely. I had no siblings, I had good friends but they didn't live close to me. I couldn't just go into the park and play with them. If I went into the park I went alone. School holidays were lonely for me too. But I know that if I'd had the internet then, I wouldn't have felt quite so alone. I sometimes feel now that I'm not worth anyone's time; text messages and Facebook mean that I can say things and share things without being held back by that feeling- I feel as though I'm giving other people the choice whether to spend time and interact with me and I'm honoured if they do but I'm not pressuring them.
I have genuine, loving relationships with people on the other side of the world and I truly believe that technology can help us start to think of everyone as people, not just the handful we interact with on a daily basis in the 'real' world. I've seen lots of people find love and lasting relationships by means of websites and technology.
I do think it's sad when you're in a social setting everyone is glued to their screens, and I think we should be conscious of when it's happening and unplug and put things away. And I know that people can use the internet for terrible things, like picking on and bullying the vulnerable. But there was no mythical time when everyone was connected in the real world. Loneliness wasn't caused by smartphones.
When I spent weeks sitting in my living room after surgery because I had to have my leg immobile, my online friends were my only friends most days. They were there for me in a way that real life friends often couldn't be because they had their lives to lead and I couldn't physically go and join them in that.
So by all means, go out, talk to people. Enjoy the moment and don't be obsessed with recording it for likes. Take advantage of the good parts of technology, try to resist the bad parts, and don't feel guilty for not unplugging or self righteous because you do. Look up every once in a while but don't let your head get lost in the clouds.
Thursday, 6 June 2013
Free Pattern: Lacy Coasters
At the beginning of this week I moved offices. Where I was before there wasn't really any scope for expressing myself because it was in a more public area, and there was lots of work stuff around that didn't really fit with my style.
Patterns
These coasters should be pretty easy to make. The smaller one requires you to crochet in back loops. If you're not familiar with doing that, here is a good tutorial.
I blocked these to make them lay completely flat by laying them face down on an ironing board, placing a tea towel over them, spraying the tea towel with water and ironing them briefly through the damp tea towel.
You will need:
- A small amount of worsted weight yarn (I used Lily Sugar'n cream, and used less than half a ball for the three coasters)
- A 5mm hook (US size H)
Large Coaster
This coaster measures about 11cm across with the yarn/hook combination above.
Round 1: Make a magic ring, chain 2 (counts as first dc), 11dc in the ring. Pull tight & sl st into top of chains to join the circle.
Round 2: *Ch 2, skip a dc and sl st into the next dc* repeat from * 6 times. (Six ch 2 loops made)
Round 3: Sl st into first ch2 loop, ch 3, (counts as a dc) dc 4 into the loop. *ch2, 5dc in next loop* repeat from * 5 times, ch 2, sl st into top of ch 3.
Round 4: sl st in top of next 2 dcs, *ch 3, sl st in same dc, dc 7 times into next ch2 space, skip 2 dcs, sl st into next dc* repeat from * 6 times. Fasten off and weave in ends.
Small Coaster
This coaster measures about 9cm across with the yarn/hook combination above.
Round 1: Make a magic ring, chain 2 (counts as first dc), 11dc in the ring. Pull tight & sl st into top of chains to join the circle.
Round 2: 2sc in back loop in each dc around. sl st into first sc. (24 sc).
Round 3: *Skip 1 sc, 5 dc in next sc, skip one sc, sl st in next sc* repeat from * 6 times
Round 4: *ch3, sl st in same stitch, sc in back loops of next 5 dcs, sl st into next st* repeat from * 6 times. Fasten off and weave in ends.
Enjoy your new little coasters! ♥
Subscribe to:
Posts (Atom)


