Showing posts with label home. Show all posts

Monday, 7 December 2015

Free Pattern: Snowflake Wishes 5

two crochet snowflake Christmas ornaments - www.wishesintherain.net
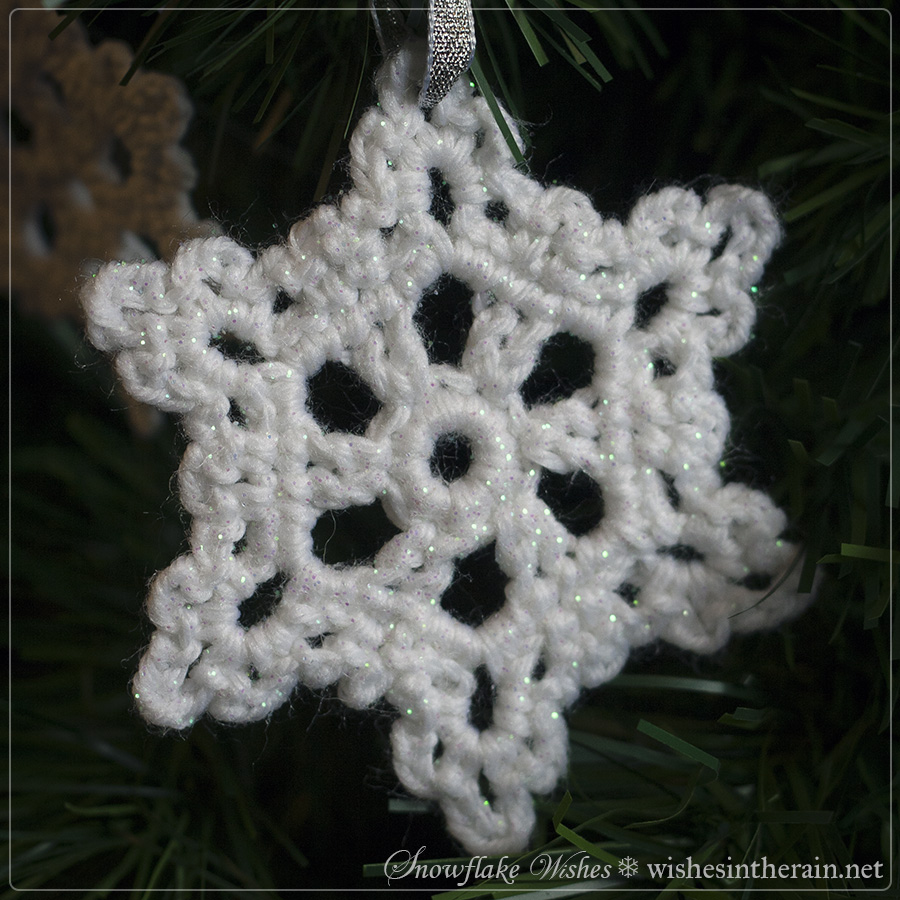
This is my last snowflake wish for now - it turns out I need to crochet other things like Christmas presents and baby blankets and some fingerless gloves which I hope share with you soon. This is the pattern I go to if I want a larger snowflake, even though it is only four rounds of crochet. Although it may look complicated it's actually quite simple and only uses basic stitches.

crochet snowflake tree ornament - www.wishesintherain.net
This snowflake is about 9cm (3.5in) when made in dk with a 2.75mm (C) hook, or about 12cm (4.7in) in worsted with a 3.5mm (E) hook.

As always I block all my snowflakes with a mixture of PVA glue, water and glitter to make them stiffer and sparkly. I feel this pattern is particularly in need of blocking. You can read my snowflake blocking instructions.

Pattern
You will need: 
  • Small amount of white yarn in any weight you like (I used worsted and dk; these patterns were designed with those weights in mind)
  • Crochet hook, from 2.5mm to 3.5mm (E) or 4mm (G) depending on the yarn you use and how tightly you want to crochet
  • Thread or ribbon to hang it from a tree
  • needle for weaving in ends
  • optional materials for blocking: water, PVA glue and glitter, or spray starch.

Stitches used:
US: ch, sl st, sc, hdc, dc.
UK: ch, sl st, dc, htr, tr.

US Instructions:

Ch 6, join with sl st to form loop

Round 1: sc 12 times into loop, join with sl st into first sc

Round 2: ch5, *sc, sc, ch5* 5 times, sc, sl st

Round 3: *hdc, dc3, ch3, dc3, hdc, sl st into second sc,* 6 times

Round 4: sl st in first 4 sts up to ch 3 space, *(sc, ch3, sc, ch5, sc, ch3, sc) in ch3 loop, ch3, skip sts to next ch3 loop* six times, sl st in first sc of round. Bind off, weave in ends, block.

UK Instructions:

ch 6, join with sl st to form loop

Round 1: dc 12 times into loop, join with sl st into first dc

Round 2: ch5, *dc, dc, ch5* 5 times, dc, sl st

Round 3: *htr, tr3, ch3, tr3, htr, sl st into second dc,* 6 times

Round 4: sl st in first 4 sts up to ch 3 space, *(dc, ch3, dc, ch5, dc, ch3, dc) in ch3 loop, ch3, skip sts to next ch3 loop* six times, sl st in first dc of round. Bind off, weave in ends, block.

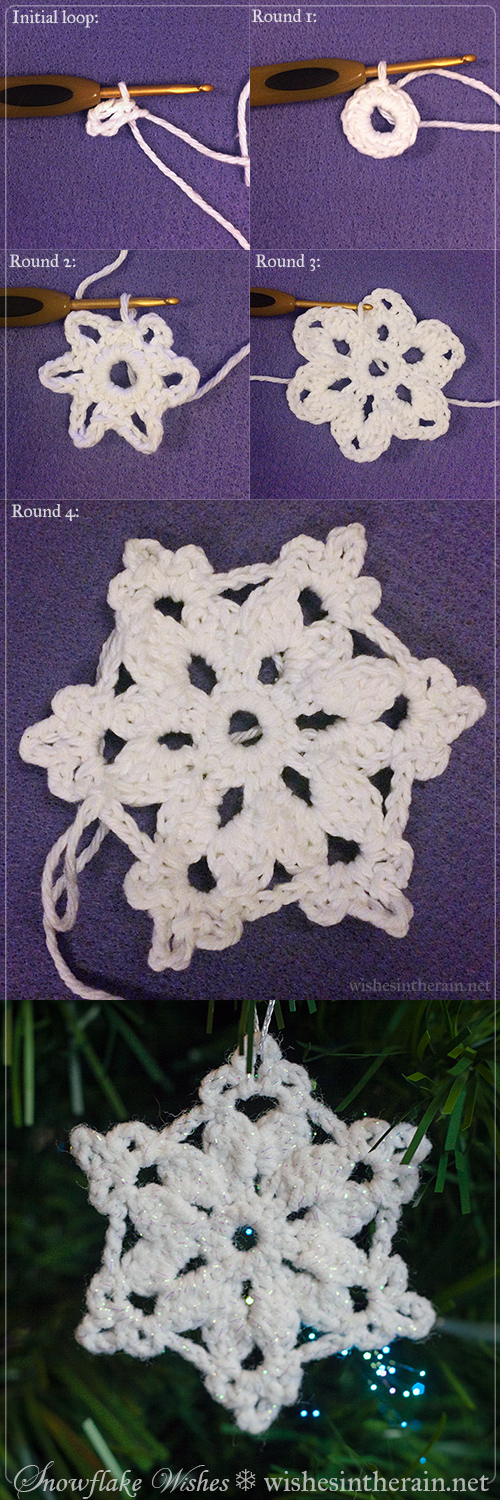
Here are photos of what the snowflake should look like at each stage:

crochet snowflake photo tutorial - www.wishesintherain.net <


Happy snowflake making ♥

Friday, 4 December 2015

Free Pattern: Snowflake Wishes 4

crochet snowflakes in a Christmas tree - www.wishesintherain.net


Christmas is getting closer, and I know a lot of you will have put your trees up already. I really enjoy seeing other peoples trees and lights as I travel after dark, though I don't think I'll put my tree up for a little while.

If you're still looking for decoration inspiration, though, here's another snowflake! This is actually the first one I designed a few years ago. I like it because there are only three rounds so it's simple and fast to crochet, and I finish sooner than I think I'm going to.

crochet christmas snowflake - www.wishesintherain.net

This snowflake is around 7cm (2.75in) across when made with dk yarn and a 2.75mm (C) hook, and 9cm  (3.5in) when made with worsted weight yarn and a 3.5mm (E) hook.


As always I block all my snowflakes with a mixture of PVA glue, water and glitter to make them stiffer and sparkly. You can read my snowflake blocking instructions.

Pattern
You will need: 
  • Small amount of white yarn in any weight you like (I used worsted and dk; these patterns were designed with those weights in mind)
  • Crochet hook, from 2.5mm to 3.5mm (E) or 4mm (G) depending on the yarn you use and how tightly you want to crochet
  • Optional thread or ribbon to hang them to a tree - if you don't want to use thread you can make large loop in the snowflake, see below
  • needle for weaving in ends
  • optional materials for blocking: water, PVA glue and glitter, or spray starch.

Stitches used:
US: ch, sl st, sc, dc, trc. Optional, chainless starting dc.
UK: ch, sl st, dc, tr, dtr. Optional, chainless starting treble (see link above for explanation in US terms).

US Instructions:

Ch5, join with sl st to form a loop.

Round 1: ch 4 (counts as 1 dc and one ch - alternatively, starting dc, ch1), *dc, ch1* into loop 11 times, join with sl st to 3rd chain of ch4 (or top of starting dc).

Round 2: sl st into first ch1 space, *dc, ch1, trc, ch1, dc in next space, sc in next space* 5 times, dc, ch1, trc, ch1, dc in next space, join with sl st to first sl st in round.

Round 3: *ch1, skip dc, sc into ch1 space, ch3, sc into trc, ch5, sc into same st, ch3, sc into ch1 space, ch1, skip dc, sc into sc* five times, ch1, skip dc, sc into ch1 space, ch3, sc into trc, ch5, sc into same st, ch3, sc into ch1 space, ch1, skip dc, sl st into sl st on previous round. Bind off and weave in ends.


UK Instructions:

Ch5, join with sl st to form a loop.

Round 1: ch 4 (counts as 1 tr and one ch - alternatively, starting tr, ch1), *tr, ch1* into loop 11 times, join with sl st to 3rd chain of ch4 (or top of starting tr).

Round 2: sl st into first ch1 space, *tr, ch1, dtr, ch1, tr in next space, dc in next space* 5 times, tr, ch1, dtr, ch1, tr in next space, join with sl st to first sl st in round.

Round 3: *ch1, skip tr, dc into ch1 space, ch3, dc into dtr, ch5, dc into same st, ch3, dc into ch1 space, ch1, skip tr, dc into dc* five times, ch1, skip tr, dc into ch1 space, ch3, dc into dtr, ch5, dc into same st, ch3, dc into ch1 space, ch1, skip tr, sl st into sl st on previous round. Bind off and weave in ends.

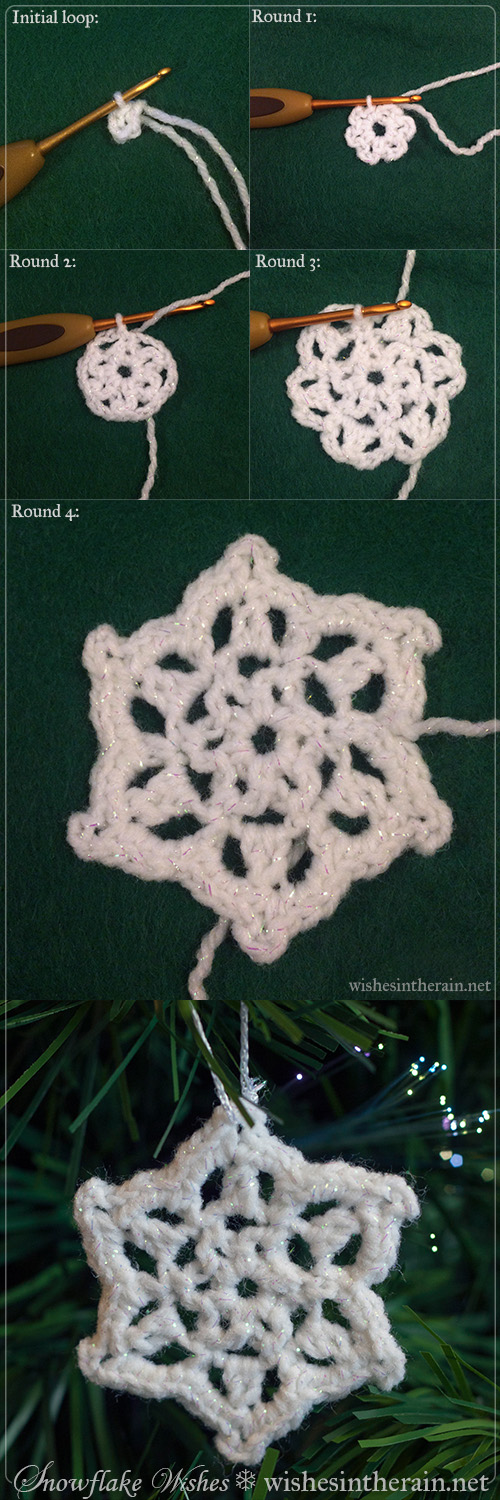
Here are some photos of what each round looks like:

instructions for making a simple snowflake - www.wishesintherain.net


US/UK: for a self loop snowflake: replace one ch5 on last round with ch20-25 to make a loop.

a snowflake hanging from a yarn loop - www.wishesintherain.net

Look out for one more snowflake pattern soon! ♥

Wednesday, 25 November 2015

Free Pattern: Snowflake Wishes 3

crochet snowflake ornaments - www.wishesintherain.net

I thought I would keep my snowflakes interesting with a few different shapes and in this case, a mini cluster stitch. Don't let the cluster put you off though, it's very easy and a gentle introduction to the technique! I was pleased with how this snowflake turned out a little floral as well. I hope you like it too ♥


glittery crochet snowflake - www.wishesintherain.net

 This snowflake is quite small - about 6.5cm (2.5in) when made in dk with a 2.75mm (C) hook, or about 9cm (3.5in) in worsted with a 3.5mm (E) hook.

As always I block all my snowflakes with a mixture of PVA glue, water and glitter to make them stiffer and sparkly. You can read my snowflake blocking instructions.

Pattern
You will need: 
  • Small amount of white yarn in any weight you like (I used worsted and dk; these patterns were designed with those weights in mind)
  • Crochet hook, from 2.5mm to 3.5mm (E) or 4mm (G) depending on the yarn you use and how tightly you want to crochet
  • Optional thread or ribbon to hang them to a tree - if you don't want to use thread you can make large loop in the snowflake, see below
  • needle for weaving in ends
  • optional materials for blocking: water, PVA glue and glitter, or spray starch.

Stitches used:
US: ch, sl st, sc, dc mini cluster (see below).
UK: ch, sl st, dc, tr mini cluster.
dc (US)/tr (UK) mini cluster:  yarn over, pull up loop, yarn over, pull through 2 loops, yarn over, pull up loop (4 loops on hook), yarn over, pull through 2 loops, yarn over, pull through 3 loops

US Instructions:

Ch 5, join with a sl st to form a ring.

Round 1: *ch3, sc* 6 times

Round 2: sl st into first ch3 loop, sc ch3, *sc into next loop, ch3* five times, join with sl st into first sc.

Round 3: ch3, dc mini cluster in ch3 space, ch3, *sc in sc, ch3, dc mini cluster in ch3 space, ch3,* five times, join with sl st into first stitch.

Round 4: *3sc in chain 3, sc, 3ch, sc in top of dc cluster, 3sc in next ch 3* 6 times. Join with sl st into first sc. Bind off, weave in ends and block.


UK Instructions:

Ch 5, join with a sl st to form a ring.

Round 1: *ch3, dc* 6 times

Round 2: sl st into first ch3 loop, dc ch3, *dc into next loop, ch3* five times, join with sl st into first dc.

Round 3: ch3, tr mini cluster in ch3 space, ch3, *dc in dc, ch3, tr mini cluster in ch3 space, ch3,* five times, join with sl st into first stitch.

Round 4: *3dc in chain 3, dc, 3ch, dc in top of tr cluster, 3dc in next ch 3* 6 times. Join with sl st into first dc. Bind off, weave in ends and block.

Here are photos of each round:

photo instructions for crochet snowflake pattern - www.wishesintherain.net


US/UK: For a self loop snowflake: replace a ch5 in Round 4 with ch 20 or ch 25.

crochet snowflake christmas decoration with loop - www.wishesintherain.net

Wednesday, 18 November 2015

Free Pattern: Snowflake Wishes 2

crochet snowflakes in a christmas tree - www.wishesintherain.net


Once I start making snowflakes, I really can't stop.  I made the larger snowflake of this pair several times, but then one time I got to the the third row and tried something different. So this pattern is two for the price of none, because it's free. I love the original version because it's pretty and lacy...

crochet snowflake tree ornament - www.wishesintherain.net
The original version is around 8.5cm (3.3in) from point to point when made with dk weight yarn (Sirdar Snuggly Pearls) and a 2.75mm (C) hook. It's around 10cm (4in) across with worsted (Lily Sugar'n Cream) and a 3.5mm (E) hook.

I love the second version because it's super fast to make but it's still cute and snowflake-y.

small free crochet snowflake ornament - www.wishesintherain.net
This version is 7cm (2.75in) from point to point when made with dk and a 2.75mm (C) hook, and 8cm (3.1in) across with worsted and a 3.5mm (E) hook.

As always I block all my snowflakes with a mixture of PVA glue, water and glitter to make them stiffer and sparkly. You can read my snowflake blocking instructions.

Pattern
You will need: 
  • Small amount of white yarn in any weight you like (I used worsted and dk; these patterns were designed with those weights in mind)
  • Crochet hook, from 2.5mm to 3.5mm (E) or 4mm (G) depending on the yarn you use and how tightly you want to crochet
  • Optional thread or ribbon to hang them to a tree - if you don't want to use thread you can make large loop in the snowflake, see below
  • needle for weaving in ends
  • optional materials for blocking: water, PVA glue and glitter, or spray starch.

Stitches used:
US: ch, sl st, sc, dc. Optional, chainless starting dc.
UK: ch, sl st, dc, tr. Optional, chainless starting treble (see link above for explanation in US terms).

US Instructions:
Ch6, join with sl st to form loop

Round 1: ch1, sc 12 times into loop, join with sl st to first sc.

Round 2: ch3 (or chainless starting dc), dc in same st, ch3, skip st, (2dcs in next st, ch 3, skip st) 5 times, join last ch3 into 3rd ch of first ch3/starting dc.

Round 3: ch1, sc in next dc, (2sc, ch5, 2sc) in ch3 space, *sc in next two dcs,  (2sc, ch5, 2sc) in ch3 space* five times, join with sl st in ch1 at start of round.

Round 4: *ch3, sc in next sc, ch2, skip 2 scs, (sc, 3ch, sc, ch5, sc, 3ch, sc) in ch 5 space, ch2, skip 2 scs, sc in sc* five times,  *ch3, sc in next sc, ch2, skip 2 scs, (sc, 3ch, sc, ch5, sc, 3ch, sc) in ch5 space, ch2, sl st into sl st on previous round. Bind off, weave in ends, block.

For the simpler, slightly smaller variation:
Alternate Round 3: ch1, sc in next dc, (sc, ch3, sc, ch5, sc, ch3, sc) in ch space, *sc in next two dcs, sc, ch3, sc, ch5, sc, ch3, sc) in ch space, join with sl st in ch1. Bind off, weave in ends, block.                         


UK Instructions:

Ch6, join with sl st to form loop

Round 1: ch1, dc 12 times into loop, join with sl st to first dc.

Round 2: ch3 (or chainless starting tr), tr in same st, ch3, skip st, (2trs in next st, ch 3, skip st) 5 times, join last ch3 into 3rd ch of first ch3/starting tr.

Round 3: ch1, dc in next tr, (2dc, ch5, 2dc) in ch3 space, *dc in next two trs,  (2dc, ch5, 2dc) in ch3 space* five times, join with sl st in ch1 at start of round.

Round 4: *ch3, dc in next dc, ch2, skip 2 dcs, (dc, 3ch, dc, ch5, dc, 3ch, dc) in ch 5 space, ch2, skip 2 dcs, dc in dc* five times,  *ch3, dc in next dc, ch2, skip 2 dcs, (dc, 3ch, dc, ch5, dc, 3ch, dc) in ch5 space, ch2, sl st into sl st on previous round. Bind off, weave in ends, block.

For the simpler, slightly smaller variation:
Alternate Round 3: ch1, dc in next tr, (dc, ch3, dc, ch5, dc, ch3, dc) in ch space, *dc in next two trs, dc, ch3, dc, ch5, dc, ch3, dc) in ch space, join with sl st in ch1. Bind off, weave in ends, block.      

Here are some photos of what your snowflake should look like after each round:
step by step instructions for two crochet snowflakes - www.wishesintherain.net


 US/UK: For a self loop snowflake: replace a ch5 (in Round 4 or Alternate Round 3) with ch 20 or ch 25.

crochet snowflake with loop in Christmas tree - www.wishesintherain.net


Thursday, 5 November 2015

Free Pattern: Snowflake Wishes 1

two crochet snowflakes hanging in a christmas tree - www.wishesintherain.net


No matter what the forecast is for the UK as a whole, Wishes in the Rain very rarely becomes Wishes in the Snow, even if it's snowing in the hills nearby. However, I have crochet, and crochet snowflakes are not as cold! They're also perfect to decorate your Christmas tree or to give away to friends. I first crocheted snowflakes to put in Christmas cards a couple of years ago, and very soon I found myself making up patterns for them. I love looking at thread snowflakes but I wanted things that would be quick to make, so if I had a few minutes here or there I could get one finished, so these patterns are simple, easy to make, and written with dk, worsted and aran weight yarn in mind.


You can make them with a wide range of hooks and yarn combinations. The snowflakes pictured above are dk with a 2.75mm (C) hook on the left and is about 9cm (3.5in) from point to point, and worsted with a 3.5mm (E) hook on the right, about 11cm (4.5in) from point to point.

pretty crochet snowflake - www.wishesintherain.net


Any type of yarn will work for snowflakes; personally I like yarns that come with some sparkle for example Sirdar Snuggly Pearls. Depending on your yarn and hook size combination you may need to block the snowflakes. I always block them, even if they do come out flat, with a mixture of water and PVA glue to stiffen them, and to add glitter.

Pattern
You will need: 
  • Small amount of white yarn in any weight you like (I used worsted and dk)
  • Crochet hook, from 2.5mm to 3.5mm (E) or 4mm (G) depending on the yarn you use and how tightly you want to crochet
  • Optional thread or ribbon to hang them to a tree - if you don't want to use thread you can make large loop in the snowflake, see below
  • needle for weaving in ends
  • optional materials for blocking: water, PVA glue and glitter, or spray starch

Stitches used:
US: ch, sl st, sc, dc. Optional, chainless starting dc.
UK: ch, sl st, dc, tr. Optional, chainless starting treble (see link above for explanation in US terms).

US Instructions:

Ch5, join with sl st to form loop

Round 1: ch3 (or make chainless starting dc), dc 11 times into loop, sl st into 3rd ch of ch3/starting dc to join.

Round 2: ch5, sc in next st, ch3, *sc into next st, ch5, sc in next st, ch3* five times, sl st into first st to join.

Round 3: sl st into first ch5 loop, ch3 (or make chainless starting dc), dc4, ch3, skip ch3 loop, *dc5 in next loop, ch3, skip ch3 loop,* 5 times, sl st into 3rd ch of ch3/starting dc to join.

Round 4: Ch1, (sc, ch3, sc,) in next st, (sc, ch5, sc,) in next st,  (sc, ch3, sc,) in next st, sc, ch3, *sc in next st (skip ch3 from prev round), (sc, ch3, sc) in next st, (sc, ch5, sc) in next st,  (sc, ch3, sc) in next st, sc, ch3,* five times, join with sl st to ch1 at start of round. Bind off, weave in ends.


UK Instructions:

Ch5, join with sl st to form loop

Round 1: ch3 (or make chainless starting tr), tr 11 times into loop, sl st into 3rd ch of ch3/starting tr to join.

Round 2: ch5, dc in next st, ch3, *dc into next st, ch5, dc in next st, ch3* five times, sl st into first st to join.

Round 3: sl st into first ch5 loop, ch3 (or make chainless starting tr), tr4, ch3, skip ch3 loop, *tr5 in next loop, ch3, skip ch3 loop,* 5 times, sl st into 3rd ch of ch3/starting tr to join.

Round 4: Ch1, (dc, ch3, dc,) in next st, (dc, ch5, dc,) in next st,  (dc, ch3, dc,) in next st, dc, ch3, *dc in next st (skip ch3 from prev round), (dc, ch3, dc) in next st, (dc, ch5, dc) in next st,  (dc, ch3, dc) in next st, dc, ch3,* five times, join with sl st to ch1 at start of round. Bind off, weave in ends.

Here are some photos of what your snowflake should look like after each round. For this one I've used Caron Simply Soft yarn and a 3.5mm hook.


step by step free crochet snowflake instructions - www.wishesintherain.net


US/UK: Round 4 alternative (for self-loop snowflake): Replace one ch5 with ch20 or ch25 to make a large loop. Make rest of round as normal.

crochet snowflake with loop - www.wishesintherain.net


Blocking
Blocking with PVA and glitter is messy but to my mind, worth it. Here's a picture of the steps I go through, followed by an explanation. Of course, you can leave your snowflakes unblocked or block them with spray starch instead.

step by step instructions for blocking snowflakes with pva glue and glitter - www.wishesintherain.net


1. I make sure I've sewn in all the ends etc before blocking snowflakes, and sort out ones that are self-looping to one side so I don't accidentally get the loops glue-y. I also prepare my workspace with some cling film so as not to glue glitter to surfaces in my living room, and I put cling film over a tray to hold the snowflakes while they dry. It may also be wise to have some kitchen roll to hand to mop up any spills.

2. I use Mod Podge but you can use any PVA glue. The glitter I have was sold as flower glitter in Hobbycraft a few years ago. I like it because the flakes are a little larger than most glitters. I think this technique works much better with iridescent glitter than metallic glitter, because when it's not catching the light metallic glitter looks like little black spots on the snowflakes, but iridescent glitter is harder to see.

3. I use those plastic boxes you get takeaway food in to mix my glue and water, but you can use anything you don't mind cleaning that is big enough to fit your largest snowflake in comfortably. I can't give exact amounts of how much glue and water to use, but it's around 50-50.

4: With glitter, more is more. I start off with a generous amount but keep finding myself adding more.

5. Mix the glue and water well. The resulting liquid will be very runny, not unlike cream.

6. Dunk a snowflake in the mix, and squish it with a spoon to make sure the mix soaks through.

7. Squeeze out the excess mix. I do this in my hands and don't wear gloves, so this is the messy part for me. Be aggressive - you don't want any bubbles of mixture forming in the holes in the snowflake.

8. Pull the snowflake back into shape, and lay out on the cling film to dry. You could pin it out if like and have a surface that you don't mind getting a bit gluey- maybe old foam?

I got about 14 snowflakes of different sizes done in that one box of mix pictured above. If you're running low, add a bit more water, glue, and glitter. Leave for at least a couple of days and then carefully peel the snowflakes off the cling film. Most of them don't stick but the occasional one may.

If you have made self-loop snowflakes, follow the same procedure but make sure not to get the loop wet or it will harden and be more difficult to use. For these, it's better to squeeze them flat in a folded piece of kitchen roll before reshaping and putting out to dry.

I used silver ribbon, and crochet thread to make loops to hang the snowflakes. The brands I used were Anchor Artiste Metallic thread in silver and Twilleys of Stamford Goldfingering in white. Where the holes in the snowflakes were smaller I used a needle to get the thread through. Burlap/hessian string might look nice, or twine. I have tried silver elastic but found it wasn't cost effective when purchased by the metre from the local haberdashery.

Enjoy your snowflakes, and look out for more patterns coming soon ♥

Friday, 24 July 2015

Free Pattern: Celebration Coasters


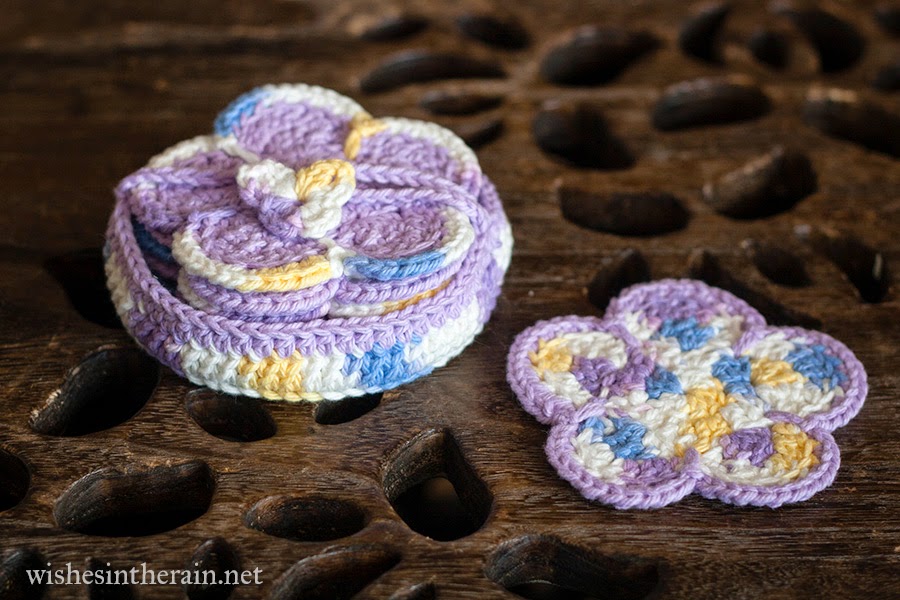
crochet lace Celebration Coasters in holder - www.wishesintherain.net
Hello. My name is Joanna, and I am addicted to designing coasters. In my defence, my cousin got married and although he and his wife said they didn't want presents, I couldn't resist making a little something!

Celebration Coasters set in holder with bow tied - www.wishesintherain.net


These coasters have a matching holder, fastened with ribbon. Alternatively you could chain a length of yarn in a contrasting colour, or leave off the ties altogether.

The coasters are10cm/4in across when made in Sugar'n Cream, and 9cm/3.5in across when made with Rico Creative Cotton Aran, using a 4.5mm hook. 


Pattern

You will need:
  • Worsted/aran weight cotton yarn, for example Lily's Sugar'n Cream, or Rico Creative Cotton. For one coaster you will need about 11m/12 yards of yarn. For the holder you will need about 24m/26 yards.  For a full set you'll need around 92m/100yards of yarn in total.
  • 4.5mm hook
  • 1m  ribbon (or 1m chain of contrasting colour yarn with ends sewn in)
  • tapestry needle for sewing in ends
  • Iron, tea cloth, water spray for blocking
Stitches used: ch, sl st, sc, hdc, dc, magic ring, chainless starting dc (this stitch is a bit tricky but well worth learning; if you don't want to use it you can ch3 instead). Some stitches need to be worked into back loops; if you're not sure how see this tutorial. US terms are used throughout; if you prefer UK ones please use this conversion chart.


Celebration Coaster - www.wishesintherain.net
Made with Rico Creative Cotton Aran

Coaster

Round 1: Dc 12 times into magic ring. Pull tight and sl st through first dc to join. (12)

Round 2: Ch 1. In back loops, 2 sc in each st around, join with sl st into first sc. (24)

Round 3: Chainless starting dc (or ch3), dc in same st, skip 1 st, (2dc in next st, skip 1 st) 11 times, join in top of 1st dc/ch3 (24)

Round 4: Ch 1, (sc in back loops of next 2 dcs, 3dcs into gap) 12 times. Join with sl st to first sc, bind off and weave in ends.

Celebration Coasters unblocked - www.wishesintherain.net
unblocked coasters don't lay completely flat

Blocking: When you finish, the coaster will not lay completely flat. Steam blocking will fix this, and only takes a minute per coaster. Lay one coaster upside down on an ironing board, and cover with a clean tea towel. Spray water over the towel, then iron briefly to flatten the coaster. If you have a steam iron you can use that instead of spraying water, and if you don't have a water spray, just dampen the tea towel first.


Celebration Coasters holder - www.wishesintherain.net

Holder

Round 1: Dc 12 times into magic ring. Pull tight and sl st through first dc to join.

Round 2: Ch2 (does not count as st - make 1st dc into same space as ch 2 throughout), 2dc in each dc around. Join to first dc. (24 sts)

Round 3: Ch2, (2dc in next st, dc in next st) 12 times. Join. (36 sts)

Round 4: Ch2, dc, (2dc in next st, dc in next 2 sts) 11 times, 2dc in next st, dc, Join (48 sts)

Round 5: Ch1, In back loops only, hdc in each st around. Join (48 sts)

Round 6: Ch1, (hdc, ch2, skip 2 sts) 16 times, join with sl st into 1st hdc. (16hdcs, 16ch2 spaces)

Round 7: (3hdc into ch2 space, sl st into hdc) 16 times. Bind off & weave in ends.


Celebration Coasters holder with ribbon - www.wishesintherain.net

To add the ribbon, turn the holder inside out and weave ribbon in and out through the holes until it goes round one and a half times (so the ends are on opposite sides of the holder). Adjust the ribbon so that both ends are the same length, and turn the holder right way out again. Place the coasters in the holder and tie a neat bow.

crochet Celebration Coaster in variegated yarn - www.wishesintherain.net
made in Lily Sugar'n Cream


Do check out my other coaster patterns ♥

Monday, 6 April 2015

Free Pattern: Sunshine Flower Coasters

flower coaster with holder


I love spring. I love the daffodils on the grass on my street, I love the cherry blossom beginning to bloom, and I really love the light evenings so I can crochet in daylight - occasionally in sunshine!

Two years ago I made these coasters for Mothering Sunday for my mother in law and my grandmother in law. I wrote down the pattern, but then lost it D: Happily it turned up again a couple of weeks ago!

two flower coasters
Made with Rico Creative Cotton Aran
I had inherited a set of wooden coasters that came in a holder, and I thought it would make an extra special gift to make a set of crochet coasters with a holder too. These are very simple to make and work up very quickly, perfect for a Mother's Day gift, especially if you've left it a little late.

flower coasters in their holder with butterfly fastening
Made with Lily Sugar'n Cream


The coasters are10cm/4in across when made in Sugar'n Cream, and 9cm/3.5in across when made with Rico Creative Cotton Aran, using 3.5mm hook. The holder is 12cm/4.5in in diameter, and 2.5cm/1in tall.

Pattern

You will need:
  • 2 or 3 colours of  worsted/aran weight cotton yarn, for example Lily's Sugar'n Cream, or Rico Creative Cotton. For one flower you will need about 15 yards of one yarn + scraps of a contrasting colour. For a full set you'll need around 140 yards of yarn in total.
  • 3.5mm hook
  • tapestry needle
  • Iron, tea cloth, water spray for blocking
Stitches used: ch, sl st, sc, hdc, dc, trc (triple crochet), magic ring. US terms are used throughout; if you prefer UK ones please use this conversion chart.


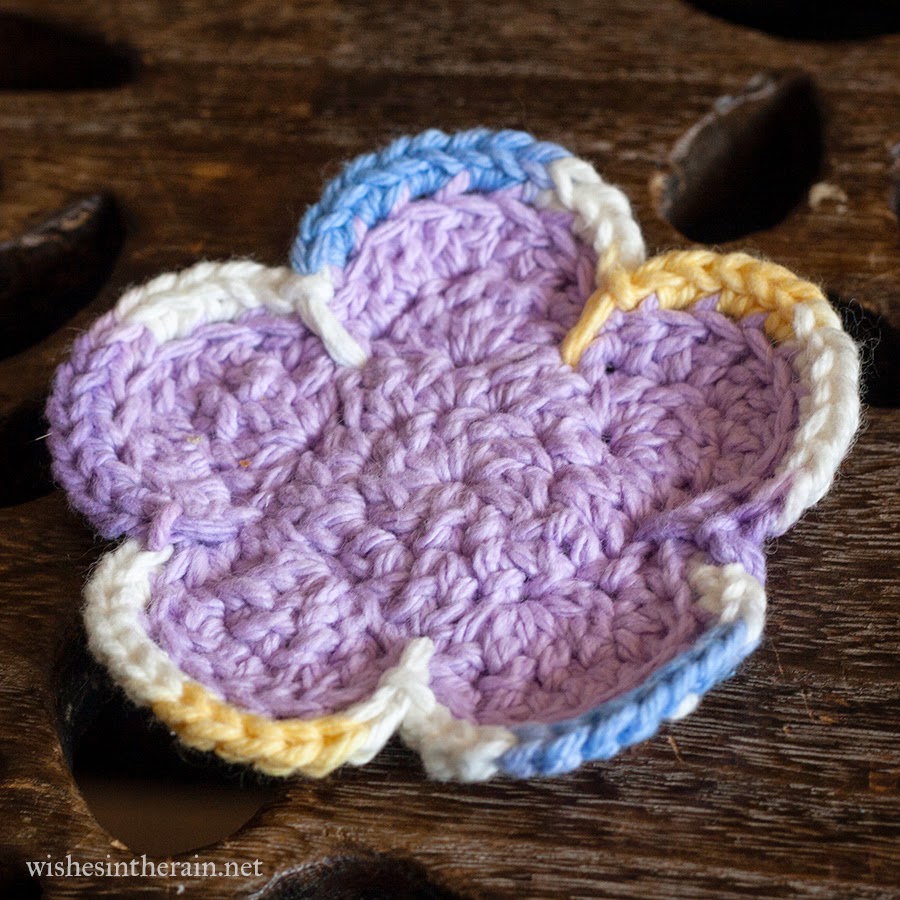
crochet flower coasters

Flower
Round 1: Dc 10 times into magic ring. Pull tight and sl st through first dc to join.
(Optional - bind off and change colour)

Round 2: Ch2 (does not count as st - make 1st dc into same space as ch 2 throughout), 2dc in each dc around. Join to first dc. (20 sts)

Round 3: Do not ch; treat the st you did sl st into on previous round as first st. * skip next st, (dc, 3trc, dc,) in one st, skip 1 st, sl st* 5 times. Sl st into 1st st. (five petals formed)

Round 4: Ch1 *hdc, 2dcs in next 3 sts, hdc, sl st* 5 times & fasten off.

Round 5: With contrasting colour, join in back loop of hdc on previous row. Starting in hdc, * 2sc in each of 8 sts around petal,  sl st down to st in round 2 below sl st on round 3* five times. Sl st into where you joined the yarn, bind off, weave in ends.

crochet flower coaster
Unblocked the coaster isn't flat


Blocking: When you finish, the flowers petals will curl up slightly. Steam blocking will fix this, and only takes a minute per coaster. Lay one coaster upside down on an ironing board, and cover with a clean tea towel. Spray water over the towel, then iron briefly to flatten the coaster. If you have a steam iron you can use that instead of spraying water, and if you don't have a water spray, just dampen the tea towel first.


crochet coaster holder

Holder
Round 1: Dc 12 times into magic ring. Pull tight and sl st through first dc to join.
Round 2: Ch2 (does not count as st - make 1st dc into same space as ch 2 throughout), 2dc in each dc around. Join to first dc. (24 sts)
Round 3: Ch2, (2dc in 1st st, dc in next st) 12 times. Join. (36 sts)
Round 4: Ch2, dc (2dc in next st, dc in next 2 sts) 11 times, 2dc in next st, dc, Join (48 sts)
Round 5: Ch2, (2dc in 1st st, dc in next 3 sts) 12 times. Join. (60 sts)
Round 6: Ch2, In back loops only, dc in each st around. Join, & bind off. (60 sts)
Round 7: Attach contrasting yarn. 30 hdc, ch 25, sl st in 1st ch, 30hdc, join to first hdc with sl st, chain 16, sl st in fourth ch from hook, bind off.
Butterfly: With first colour, attach to ch4 loop. Ch2, dc, ch2, dc, sl st into loop, (ch1, hdc 2, ch1, sl st into loop) twice, ch2, dc, ch2, dc, ch2, sl st into loop, bind off, weave in ends.

Put the coasters in the holder, and hook the butterfly through the loop to fasten it.

crochet flower coasters with butterfly holder

You may also like to try my Lacy Coasters pattern ♥

Tuesday, 24 March 2015

Free Pattern: Siobhan the Sheep Bowl

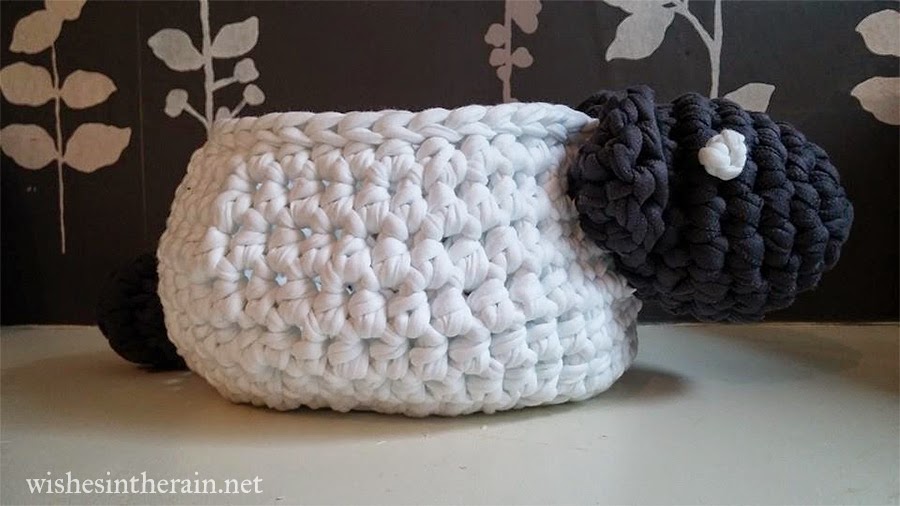
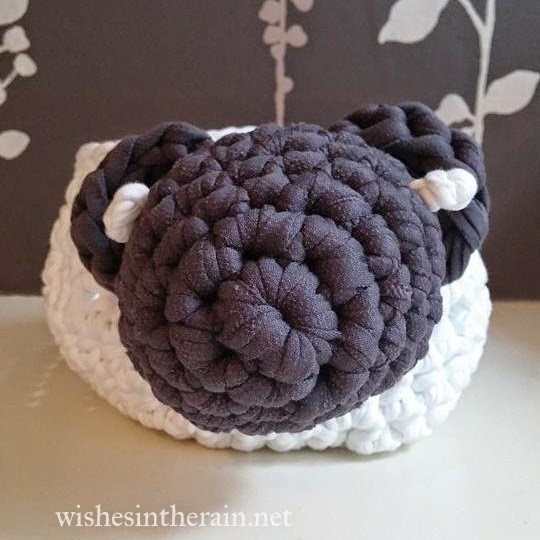
sheep crochet bowl

I promised another sheep related post after the cupcakes! A good friend of mine from University moved to Manchester last year, and I thought I should make her a house-warming gift to say welcome to the city. It wound up being very late since she moved here last summer! Her husband is Chinese, so when we were invited to celebrate the Chinese New Year with them, I thought a Sheep Bowl would be a perfect gift - fun and useful, and a nod to the time of year. She named her sheep bowl Siobhan, so that's the name of this pattern. Also I have the Shaun the Sheep theme on my brain now.

Since I decided to make a gift at the last minute, I wanted something which would be quick to do. I would have loved to make another Willow throw but I only decided on a Thursday and I needed it ready that Saturday evening. Hoooked Zpaghetti seemed to be the perfect yarn for this project - it works up extremely quickly although it can be hard work, and it's hard wearing - you can even make rugs from it.

Gauge is not important for this project, and it does actually work in lighter weight yarn and corresponding hook, though you will wind up with a very small bowl. I tried made the bowl part in worsted weight with a 3.5mm hook, and it's just about big enough for a few usb sticks for my desk at work. 

small crochet bowl

Pattern 
You will need: 
  • 35-45yards white hoooked zpagetti/t shirt yarn, (a little under a third of a 120m ball)
  • small amount dark grey/black zpagetti/t shirt yarn.* 
  • 9mm & 10mm crochet hooks
  • big tapestry/darning needle
  • stitch marker
  • Toy stuffing & pair of tights / scraps of fabric for stuffing
*It's possible to make your own t shirt yarn - have a look at this tutorial if you'd like to know how. You could also use super bulky 'normal' yarn or a few strands held together.

Stitches used: ch, sl st, sc, hdc, dc, trc (triple crochet), invdec (invisible decrease - put hook through front loops of next two sts, yarn over, pull through two loops, yo, pull through two loops), hdc dec (hdc decrease - yarn over, draw up loop through st, yo, draw up loop through next st, yo and pull through all five loops on hook), magic ring.
US terms are used throughout, if you prefer UK ones please use this conversion chart.

Bowl/Body
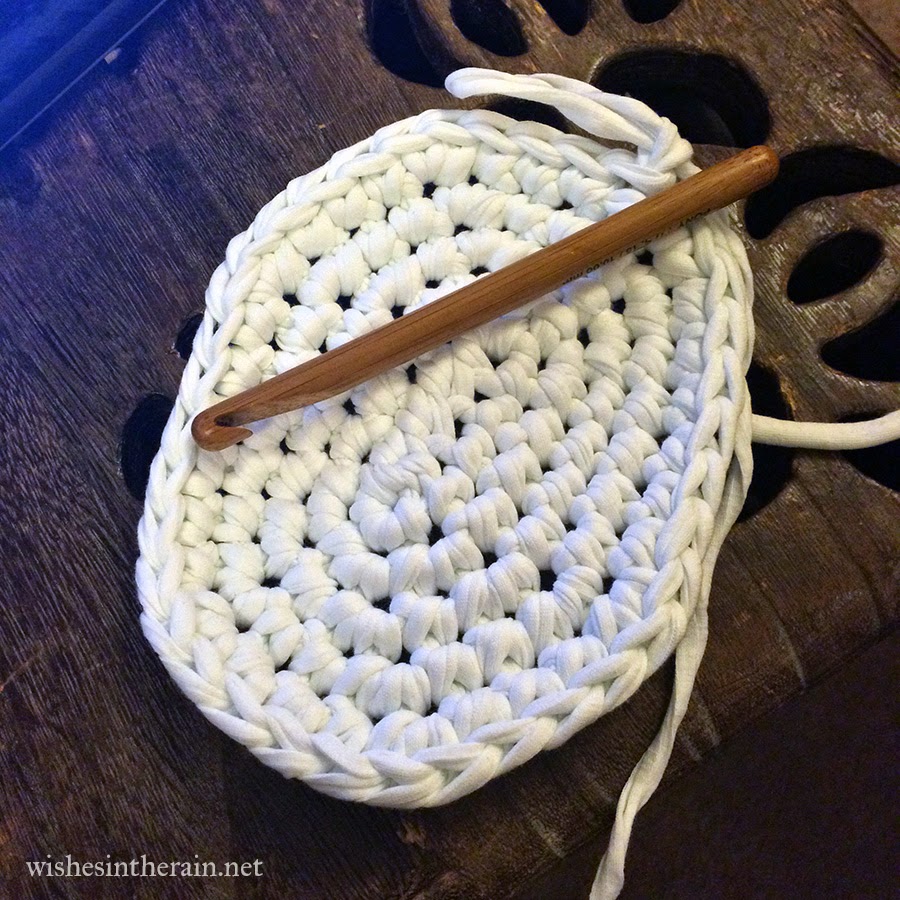
The base of the body is an oval worked in rounds. The sides of the body are worked in a continuous spiral. The initial chain is done with a smaller hook to minimise holes in the base of the bowl.

Foundation: With 9mm hook ch6. 
Change to 10mm hook

Round 1: Sc in 2nd ch from hook, sc in next 3 chs. 3 sc in last ch (crochet over the tail as you do these three sts and the rest of the first round.)
Working down the other side of the foundation chain, sc in next 3 chs, 2 scs in the last ch. Join with sl st into first sc. (12sc in total).

Round 2: Ch1, 2sc in same st, sc in next 3 sts, 2sc in next 3 sts, sc in next 3 sts, 2sc in next 2sts. Join with sl st into first sc. (18sc)

Round 3: Ch1, 2sc in same st, sc in next 4 sts, (2 sc into next st, sc into next st) three times, sc in next 3 sts, (2 sc into next st, sc into next st) twice. Join with sl st into first sc. (24sc)

Round 4: Ch1, 2sc in same st, sc in next 5 sts, (2 sc into next st, sc into next 2 sts) 3 times, sc in next 3 sts, (2 sc into next St, sc into next two Sts). Join with sl st into first sc. (30sc)

Round 5: Ch1, 2sc in same st, sc in next 6 sts, (2 sc into next st, sc into next three sts) 3 times, sc in next 3 sts, (2sc into next st, sc into next three sts. Join with sl st into first sc.(36sc)

The base should look something like this (but bear in mind I crochet left handed!):

bowl base


Round 6: Ch1. In back loops only, (2 hdc into st, hdc in next 11 sts) three times (39hdc)
Do not join.

Round 7: In both loops, hdc into first hdc of previous round & place marker into st just made, 5 hdc, (2hdc into next st, hdc in next 12 sts) twice, 2hdc into next st, 6 hdcs (42hdc)

Round 8: (2hdc into st, hdc in next 13 sts) three times (45hdc)

Rounds 9,10: hdc in each st around. Keep moving marker up a row to keep track of where rows begin and end. (45hdc)

Round 11: (hdc dec, 13 hdcs) three times. (42hdc)

Round 12: 6hdc, (hdc dec, 12hdcs) twice, hdc dec, 6hdc. Join with sl st into first hdc of round. (39hdc)

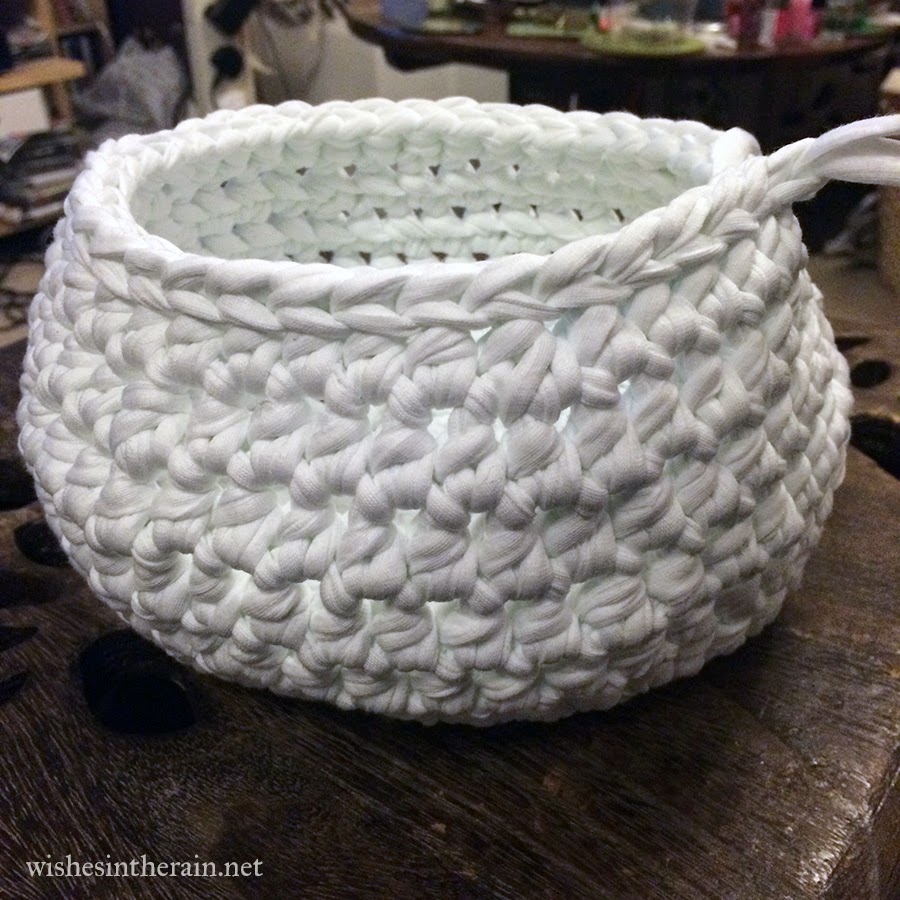
Round 13: Sl st in each St around. Bind off and weave in ends.

crochet bowl


Head
Use 9mm hook to make this tight, if you can - it's hard work! The head is worked in spirals - don't join at the end of each round, but use a stitch marker to keep track of the first stitch in each round.

Round 1: 6sc in magic ring.

Round 2: 2sc into each st around.

Round 3: (2sc into st, sc into next 3 sts) three times.

Round 4: (2sc into st, sc into next 4 sts) three times.

Round 5: (2sc into st, sc into next 5 sts) three times.

Round 6: Sc in each st around.

Round 7: (Invdec, sc into next 5 sts) three times. Bind off, leaving a long tail to sew it to the body. 

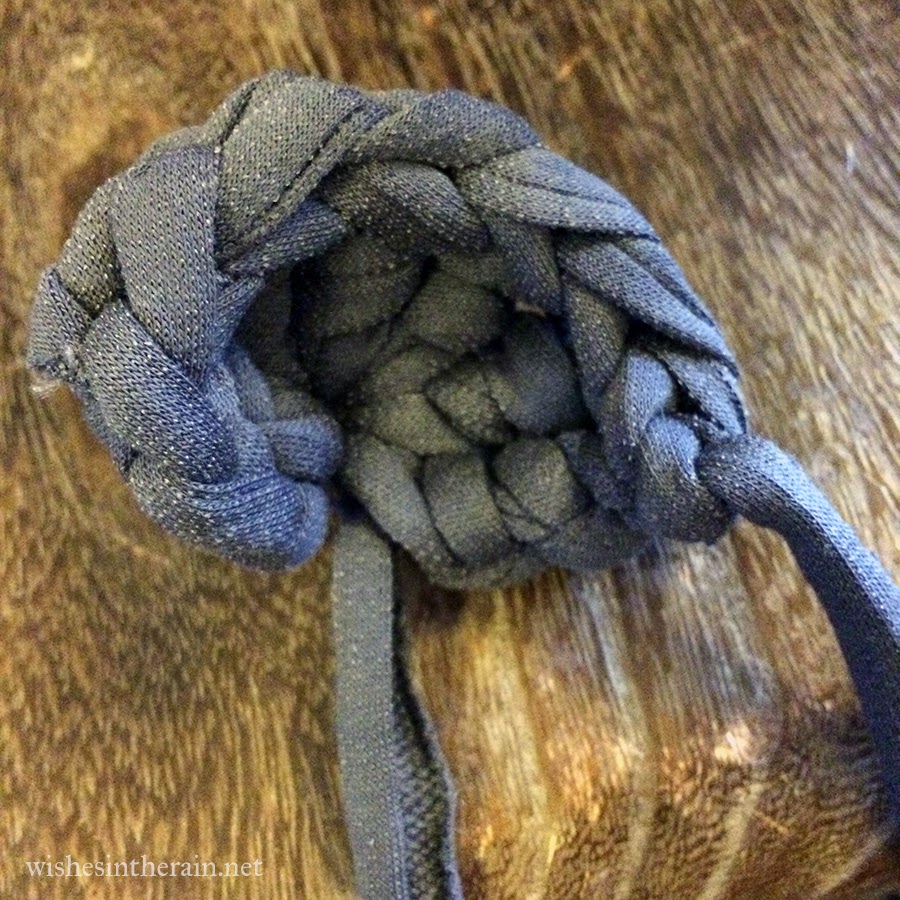
crochet sheep head in progress
just before binding off


Eyes
Sew the eyes onto the head with white yarn.
Here is how I did it, but feel free to use a different method.
1: Draw your yarn through a gap in the head with your needle.

2: Create a knot.


3. Pull knot tight

4: knot loose end underneath the knot.

5. Pull tight and draw yarn back through the same hole.

6. Secure the ends into the head on the inside to anchor the eye securely (so it can't be pulled through), and trim excess yarn.


7. All done!
yes that is one of my cats in the background.


Ears (make 2)
Using 9mm hook:
Make magic ring
Round 1: Ch 3, tc 6 times into ring. Pull ring tight and bind off, leaving a tail to sew the ear onto the head. Sew in other end.

crochet sheep ear


Tail
Using 9mm hook, working in spirals:
Round 1: 6sc into magic ring 

Round 2: 2sc in each st around

Round 3: Sc in each st around

Round 4: invdec in each st around & bind off, leaving a tail to sew to the body.

crochet sheep tail

Assembly

First stuff the head. I cut off the foot from a cheap pair of black tights, and stuffed regular toy stuffing into it. Then I tied a little knot in the end and stuffed it into the head. This way the tights show up in the gaps between stitches, which looks better, and the stuffing can't come out. You could also use scraps of fabric to stuff the head.


The stuffed head.
Then sew the ears to the top edge of the head.

Stuff the tail with a few scraps of tights/fabric. It doesn't need much.

Finally sew the head and ears to the top of one side of the body, and the tail to the bottom of the other. (See the picture at the top of the post). Weave in ends and then you're done! Your Siobhan is ready to hold your trinkets :)


crochet sheep bowl facing forward