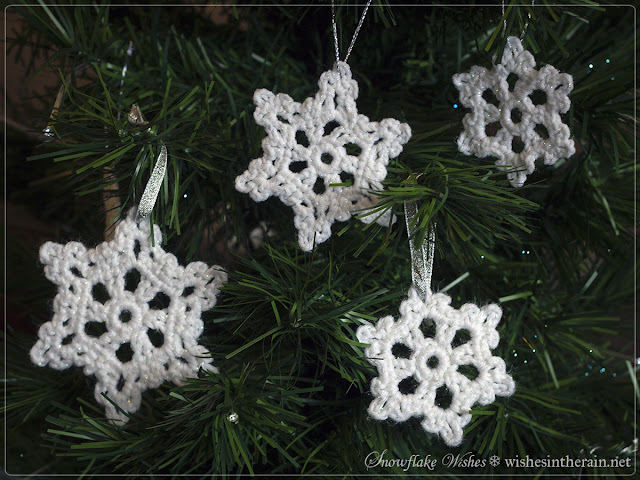
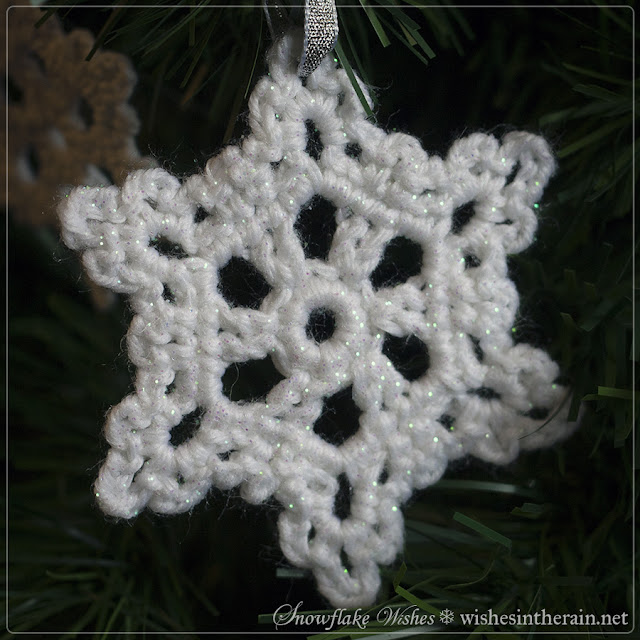
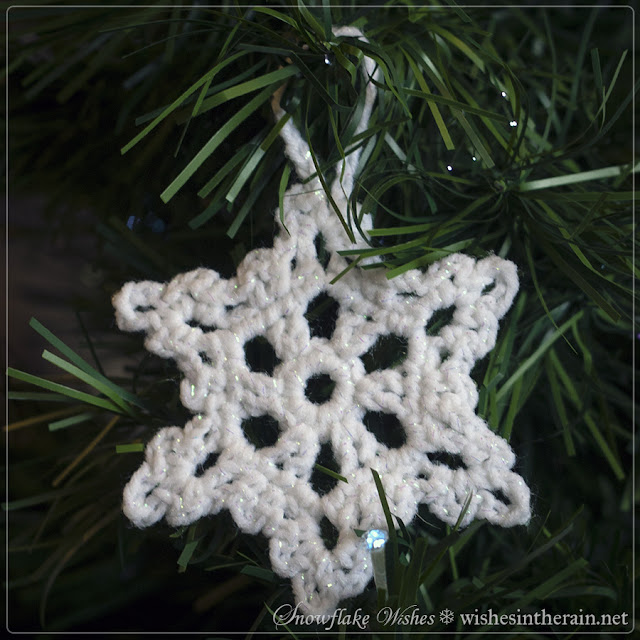
Wow it’s been a while! I make plans, then I don’t do them, I crochet things, then I don’t photograph them, and so on.
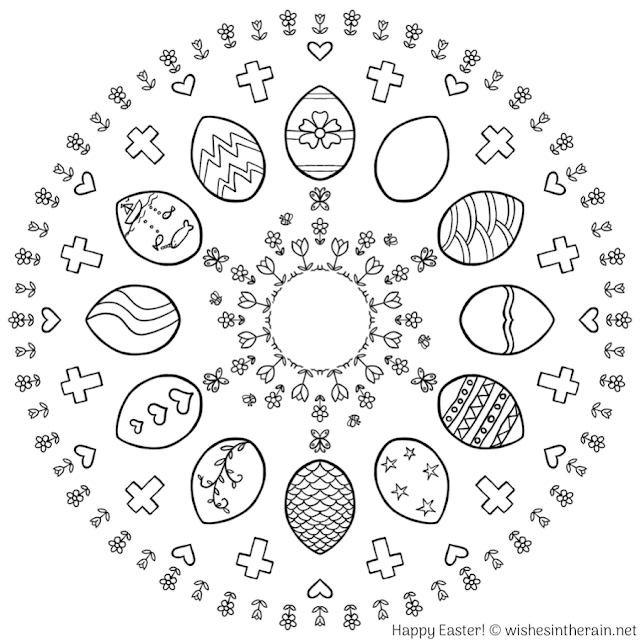
I do have some crochet patterns to share, when I check them over to make sure they make sense, but in the meantime, I’ve been experimenting with an app called Amaziograph, and while my drawing skills are not up to much, I find it very relaxing. I’ve made some colouring pages and I thought I’d share one! Happy Easter. Although it’s not the holiday we were hoping for, I hope it’s still a good one for you. x
Download Happy Easter Colouring hi res PNG
Download Happy Easter Colouring A4 PDF
wishes in the rain
Crochet patterns, recipes and more from a girl who lives in the rain.
Thursday, 9 April 2020
Thursday, 10 December 2015
Free Pattern: A Kingdom Far, Far Away
I don't know why, but I can't wear normal gloves. I was able to wear mittens as a small child, but anything around the ends of my fingers make my hands feel itchy. I love wrist warmers/fingerless gloves/fingerless mitts a lot. I think the only thing I don't love about them is that they have so many different names! ;)
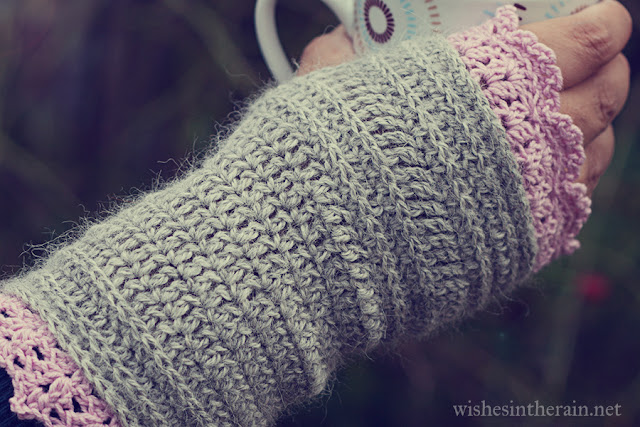
Every year since I've been able to crochet I've made myself a new pair. Normally I lose my wrist warmers during the summer (I think somewhere there must be a stash of them in my house that I can't find). Although this year was an exception, and I do still have my wrist warmers from last year, I wanted some new ones anyway. A girl can never have too many accessories, right?
Recently, I have become interested in 3rd loop hdc stitches. I love how they add a little bit of dimensional texture to a flat piece of crochet, and how they're like knitting, but not quite the same. I also felt that I need some pink, and some lace... and A Kingdom Far, Far Away was born. I made these for me, to be the perfect shape and length, but you can make them for you too with just a bit of work. There are some more advanced stitches here, for example the third loop hdc, foundation hdc, and chainless starting dc, but don't be put off - they're easy to learn, I'm linking tutorials, and some, like the chainless starting dc, can change a lot of your projects for the better (seriously it is that good of a stitch). You will have to work out the number of stitches for the size you want, but I've tried to make it as straightforward as possible. I have only made these once so apologies in advance for any errors!
Pattern
Notes:
My gauge was 42hdc = 8in/20cm. My wrist warmers/fingerless gloves were 9in (23cm) long - around 7in (18cm) for the main section and 1in (2.5cm) each for the top and bottom borders. Don't worry if you can't make gauge, just make the size that fits you. I have only worked out the number of stitches for a large size. However, you can make a smaller/different size if you're not afraid of a little arithmetic.
Calculating increases: Divide number of sts on previous round by 3, subtract 1 for the number of stitches between each increase
Calculating decreases: Divide number of sts on previous round by 3, subtract 2 for the number of stitches between each decrease
All increases and decreases (apart from increase in round 18 if you don't have a multiple of 6 sts) are optional - if you're making these for yourself, do what fits you best. Also feel free to add or subtract rounds between Round 5 and Round 11 to get the length you would like.
The left and right wrist wamers (right and left if you're left handed) are slightly different. Follow the right/left guidelines depending on which one you're making.
You will need:
- Yarn A: around 137yards/125m Sport weight with a 3.75 mm (F) hook (could try dk with a 4mm (G) hook). I used Adriafil Sierra Andina in grey
- Yarn B: around 44yards/40m 4ply with 3mm hook. I used Rowan Wool Cotton 4ply in pink.
- Needle to sew in ends
Stitches used (In US terms throughout): sc, hdc, dc, trc, foundation hdc (fhdc), 3rd loop hdc, chainless starting dc, dc mini cluster (see below), picot (see below).
dc mini cluster: yarn over, pull up loop, yarn over, pull through 2 loops, yarn over, pull up loop (4 loops on hook), yarn over, pull through 2 loops, yarn over, pull through 3 loops.
picot: ch3, sl st into first ch.
Main section:
With Yarn A and 3.75mm (F) hook:
Foundation: 42 (or a multiple of 3 that fits around your arm) fhdc, join with a sl st to make a circle (make sure it doesn't twist).
Round 1: ch1, hdc in first hdc and in each st across. Join with sl st to first hdc. (42)
Round 2: ch1, hdc in 3rd loop of each hdc on previous round. Join with a sl st to first hdc. (42)
Round 3: ch1, normal hdc in each st around. Join with a sl st to first hdc. (42)
Round 4: ch2, (does not count as st on this or any other row) dc in 3rd loop of each hdc around. Join with sl st to first dc. (42)
Round 5: ch2, dc in each st around, join (42)
Round 6: (decrease) ch2, *dec over 1st 2 sts, dc in next 12 sts* three times (39)
Round 7: ch2. dc in each st around, join. (39)
Round 8: (decrease) ch2, *dec over 1st 2 sts, dc in next 11 sts* three times, join (36)
Rounds 9, 10: ch2, dc in each st around, join. (36)
Round 11: (increase) ch2, *2dcs into first st, dc in next 11 sts* three times, join (39)
Round 12: ch1, hdc in each st around. (39)
Round 13: (increase), ch1, working in 3rd loops, *2hdc into first st, hdc in next 12 sts* three times, join (42)
Round 14: ch1, normal hdc in each st around, join (42)
Round 15 Right: ch3, trc in first 33 sts, ch 8, tc in last st, join into first tc (42) (leave 8 sts unworked for thumbhole. If you want a smaller thumbhole, reduce the number of chs and the number of unworked sts.)
Round 15 Left: ch3, trc, ch 8, tc in remaining sts, join to first tc (42) (leave 8 sts unworked for thumbhole)
Round 16: ch1, hdc in each st around (work into bumps of chains for neat finish) (42)
Round 17: ch1, hdc in 3rd loop of each hdc on previous round. Join with a sl st to first hdc. (42)
Round 18: ch1, normal hdc in each st around. Join with a sl st to first hdc. (42) If this row is not a multiple of six, increase by three.
Round 19: ch1, hdc in 3rd loop of each hdc on previous round. Join with a sl st to first hdc. (42)
Round 20: ch1, sc in each st around. Join, bind off & weave in ends.
Thumbhole:
With Yarn A and 3.75mm (F) hook:
Left: join in bottom right corner of thumbhole (near seam). Work 8sc across bottom, 3 sc along trc, 8 sc across top in ch sts, 3 sc along trc, join with sl st into first sc. Bind off & weave in ends.
Right: join in top left corner of thumbhole (near seam). Work 8sc across top in ch sts, 3 sc along trc, 8 sc along bottom, 3 sc along trc, join with sl st into first sc. Bind off & weave in ends.
Top Border:
With Yarn B:
With 3.75mm hook, join Yarn B with a sl st into 3rd loop of hdc from round 19. Sl st in each 3rd loop around (42 sl sts). The photo below illustrates where to join your yarn: (please note I'm left handed so this may look a bit backwards to you!)
 |
| click for larger version |
Round 1: Chainless starting dc, ch1, dc in same st, skip 2 sl sts, *(dc, ch1 dc) in same sl st, skip 2 sl sts* 13 times, join with sl st to starting dc.
Round 2: sl st into ch space, ch2, dc (counts as first dc mini cluster), ch1, dc mini cluster, *(dc mini cluster, ch1, dc mini cluster) in next ch space* 13 times, join with sl st into top of first dc.
Round 3: sl st into ch1 space, 5 dcs into next ch1 space, *sl st into next ch1 space, 5 dc into next ch1 space* 6 times, join with sl st into first sl st
Round 4: in back loops, sc in first dc, (ch3, sc,) 4 times, skip sl st, *sc, (ch3, sc) 4 times, skip sl st* six times, join to first sc, bind off and weave in ends.
Bottom Border
With Yarn B:
With 3.75mm hook, With seam facing you, sl st in 3rd hdc loop of foundation hdc in each st around (42 sl sts)
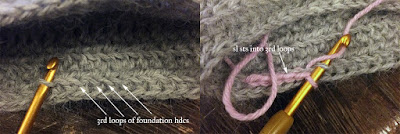 |
| click for larger version |
With 3mm hook:
Round 1: Chainless starting dc, 3dc into same sl st, skip 2 sts, *4dc into sl st, skip 2 sts* 13 more times, join with sl st into starting dc
Round 2: sl st into second dc, sl st into space between 2nd and 3rd dcs. Chainless starting dc, 3dc into same space, *4dc into next gap between 2nd and 3rd dcs* 13 times, join
Round 3: sl st into second dc, s sl into space between 2nd and 3rd dcs. Ch 1, *(2hdcs, picot, 2hdcs) into space between 2nd and 3rd dcs* 14 times, join, bind off, weave in ends.
Finishing
I didn't block my wrist warmers and don't think they need it. I think I would only block a pair if the yarn turned out scratchy when crocheted up. Enjoy your new creation! ♥
Monday, 7 December 2015
Free Pattern: Snowflake Wishes 5
This is my last snowflake wish for now - it turns out I need to crochet other things like Christmas presents and baby blankets and some fingerless gloves which I hope share with you soon. This is the pattern I go to if I want a larger snowflake, even though it is only four rounds of crochet. Although it may look complicated it's actually quite simple and only uses basic stitches.
This snowflake is about 9cm (3.5in) when made in dk with a 2.75mm (C) hook, or about 12cm (4.7in) in worsted with a 3.5mm (E) hook.
As always I block all my snowflakes with a mixture of PVA glue, water and glitter to make them stiffer and sparkly. I feel this pattern is particularly in need of blocking. You can read my snowflake blocking instructions.
Pattern
You will need:
Stitches used:
US: ch, sl st, sc, hdc, dc.
UK: ch, sl st, dc, htr, tr.
US Instructions:
Ch 6, join with sl st to form loop
Round 1: sc 12 times into loop, join with sl st into first sc
Round 2: ch5, *sc, sc, ch5* 5 times, sc, sl st
Round 3: *hdc, dc3, ch3, dc3, hdc, sl st into second sc,* 6 times
Round 4: sl st in first 4 sts up to ch 3 space, *(sc, ch3, sc, ch5, sc, ch3, sc) in ch3 loop, ch3, skip sts to next ch3 loop* six times, sl st in first sc of round. Bind off, weave in ends, block.
UK Instructions:
ch 6, join with sl st to form loop
Round 1: dc 12 times into loop, join with sl st into first dc
Round 2: ch5, *dc, dc, ch5* 5 times, dc, sl st
Round 3: *htr, tr3, ch3, tr3, htr, sl st into second dc,* 6 times
Round 4: sl st in first 4 sts up to ch 3 space, *(dc, ch3, dc, ch5, dc, ch3, dc) in ch3 loop, ch3, skip sts to next ch3 loop* six times, sl st in first dc of round. Bind off, weave in ends, block.
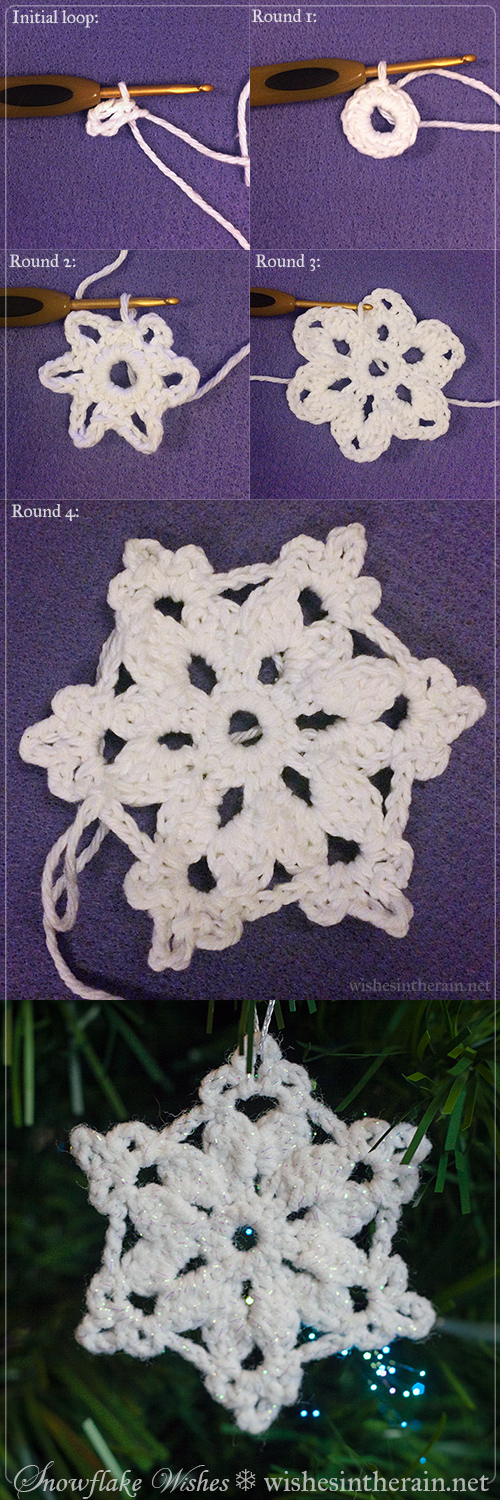
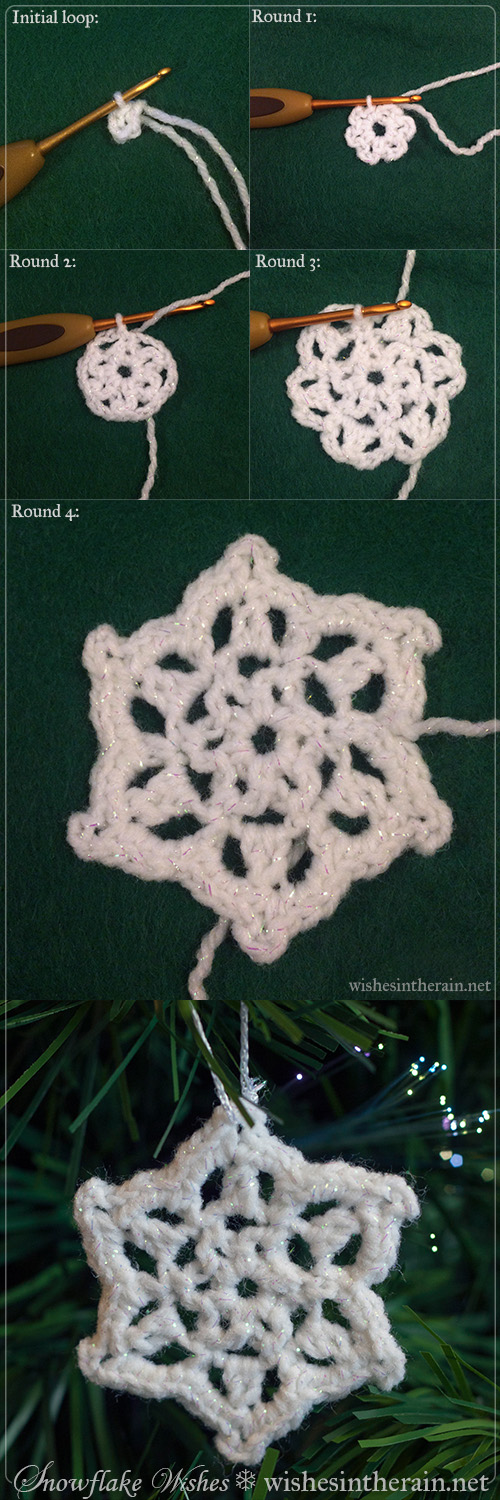
Here are photos of what the snowflake should look like at each stage:
Happy snowflake making ♥
This snowflake is about 9cm (3.5in) when made in dk with a 2.75mm (C) hook, or about 12cm (4.7in) in worsted with a 3.5mm (E) hook.
As always I block all my snowflakes with a mixture of PVA glue, water and glitter to make them stiffer and sparkly. I feel this pattern is particularly in need of blocking. You can read my snowflake blocking instructions.
Pattern
You will need:
- Small amount of white yarn in any weight you like (I used worsted and dk; these patterns were designed with those weights in mind)
- Crochet hook, from 2.5mm to 3.5mm (E) or 4mm (G) depending on the yarn you use and how tightly you want to crochet
- Thread or ribbon to hang it from a tree
- needle for weaving in ends
- optional materials for blocking: water, PVA glue and glitter, or spray starch.
Stitches used:
US: ch, sl st, sc, hdc, dc.
UK: ch, sl st, dc, htr, tr.
US Instructions:
Ch 6, join with sl st to form loop
Round 1: sc 12 times into loop, join with sl st into first sc
Round 2: ch5, *sc, sc, ch5* 5 times, sc, sl st
Round 3: *hdc, dc3, ch3, dc3, hdc, sl st into second sc,* 6 times
Round 4: sl st in first 4 sts up to ch 3 space, *(sc, ch3, sc, ch5, sc, ch3, sc) in ch3 loop, ch3, skip sts to next ch3 loop* six times, sl st in first sc of round. Bind off, weave in ends, block.
UK Instructions:
ch 6, join with sl st to form loop
Round 1: dc 12 times into loop, join with sl st into first dc
Round 2: ch5, *dc, dc, ch5* 5 times, dc, sl st
Round 3: *htr, tr3, ch3, tr3, htr, sl st into second dc,* 6 times
Round 4: sl st in first 4 sts up to ch 3 space, *(dc, ch3, dc, ch5, dc, ch3, dc) in ch3 loop, ch3, skip sts to next ch3 loop* six times, sl st in first dc of round. Bind off, weave in ends, block.
Here are photos of what the snowflake should look like at each stage:
Happy snowflake making ♥
Saturday, 5 December 2015
What I made: Snowflake Wishes Hat
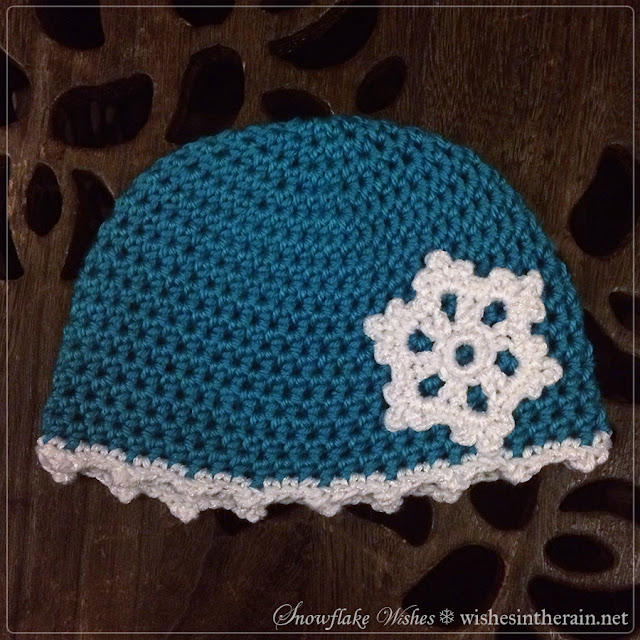
A childhood friend of mine became a father for the first time this summer, and, since I was going to see his parents today, I thought it would be nice to make a hat for his baby. Since I'm all about snowflakes right now it was easy to decide what type of hat to make!
I used Elizabeth Roggasch's Half Double Crochet Beanie as a base for the hat. Hdcs are my favourite stitch to use for a hat because it doesn't take too long to grow, they have give, and they're really easy to attach things to afterwards. This is a really nice pattern because it gives measurement guidelines so you know even if your gauge is off (mine always is) that your hat will be the right size.
I used Caron Simply Soft yarn in Blue Mint for the main body of the hat. I used White in the same yarn for the edging and snowflake, held together with Twilleys of Stamford Goldfingering in white. It's hard to see from the photo, but it gives it a little bit of sparkle.For more information on specific yarns etc, see my project on Ravelry.
I intended to make the 3-6 month size, but lost concentration and wound up with 54 stitches on round 6 instead of 50. However, I have tight tension and when I measured it seemed to be the correct size (even though it wound up being the 6-9month size as written). Also I wanted to end up with a multiple of three stitches on the last round. The other main modification I made was working in a spiral rather than rounds; this meant I avoided having a seam. I finished up with a border of scs in white with a picot (ch3, sl st into first ch) every three stitches.
For the snowflake, I used a 3.5mm hook to make my Snowflake Wishes 2 snowflake. I sewed it on to the hat making sure to sew down the ch5s from the snowflake to the hat to prevent it from curling.
I'm really pleased with how this came out, especially since it was so simple to do! Worth bearing in mind making something like this for a last minute Christmas present :)
Friday, 4 December 2015
Free Pattern: Snowflake Wishes 4
Christmas is getting closer, and I know a lot of you will have put your trees up already. I really enjoy seeing other peoples trees and lights as I travel after dark, though I don't think I'll put my tree up for a little while.
If you're still looking for decoration inspiration, though, here's another snowflake! This is actually the first one I designed a few years ago. I like it because there are only three rounds so it's simple and fast to crochet, and I finish sooner than I think I'm going to.
This snowflake is around 7cm (2.75in) across when made with dk yarn and a 2.75mm (C) hook, and 9cm (3.5in) when made with worsted weight yarn and a 3.5mm (E) hook.
As always I block all my snowflakes with a mixture of PVA glue, water and glitter to make them stiffer and sparkly. You can read my snowflake blocking instructions.
Pattern
You will need:
- Small amount of white yarn in any weight you like (I used worsted and dk; these patterns were designed with those weights in mind)
- Crochet hook, from 2.5mm to 3.5mm (E) or 4mm (G) depending on the yarn you use and how tightly you want to crochet
- Optional thread or ribbon to hang them to a tree - if you don't want to use thread you can make large loop in the snowflake, see below
- needle for weaving in ends
- optional materials for blocking: water, PVA glue and glitter, or spray starch.
Stitches used:
US: ch, sl st, sc, dc, trc. Optional, chainless starting dc.
UK: ch, sl st, dc, tr, dtr. Optional, chainless starting treble (see link above for explanation in US terms).
US Instructions:
Ch5, join with sl st to form a loop.
Round 1: ch 4 (counts as 1 dc and one ch - alternatively, starting dc, ch1), *dc, ch1* into loop 11 times, join with sl st to 3rd chain of ch4 (or top of starting dc).
Round 2: sl st into first ch1 space, *dc, ch1, trc, ch1, dc in next space, sc in next space* 5 times, dc, ch1, trc, ch1, dc in next space, join with sl st to first sl st in round.
Round 3: *ch1, skip dc, sc into ch1 space, ch3, sc into trc, ch5, sc into same st, ch3, sc into ch1 space, ch1, skip dc, sc into sc* five times, ch1, skip dc, sc into ch1 space, ch3, sc into trc, ch5, sc into same st, ch3, sc into ch1 space, ch1, skip dc, sl st into sl st on previous round. Bind off and weave in ends.
UK Instructions:
Ch5, join with sl st to form a loop.
Round 1: ch 4 (counts as 1 tr and one ch - alternatively, starting tr, ch1), *tr, ch1* into loop 11 times, join with sl st to 3rd chain of ch4 (or top of starting tr).
Round 2: sl st into first ch1 space, *tr, ch1, dtr, ch1, tr in next space, dc in next space* 5 times, tr, ch1, dtr, ch1, tr in next space, join with sl st to first sl st in round.
Round 3: *ch1, skip tr, dc into ch1 space, ch3, dc into dtr, ch5, dc into same st, ch3, dc into ch1 space, ch1, skip tr, dc into dc* five times, ch1, skip tr, dc into ch1 space, ch3, dc into dtr, ch5, dc into same st, ch3, dc into ch1 space, ch1, skip tr, sl st into sl st on previous round. Bind off and weave in ends.
Here are some photos of what each round looks like:
US/UK: for a self loop snowflake: replace one ch5 on last round with ch20-25 to make a loop.
Look out for one more snowflake pattern soon! ♥
Wednesday, 25 November 2015
Free Pattern: Snowflake Wishes 3
I thought I would keep my snowflakes interesting with a few different shapes and in this case, a mini cluster stitch. Don't let the cluster put you off though, it's very easy and a gentle introduction to the technique! I was pleased with how this snowflake turned out a little floral as well. I hope you like it too ♥
This snowflake is quite small - about 6.5cm (2.5in) when made in dk with a 2.75mm (C) hook, or about 9cm (3.5in) in worsted with a 3.5mm (E) hook.
As always I block all my snowflakes with a mixture of PVA glue, water and glitter to make them stiffer and sparkly. You can read my snowflake blocking instructions.
Pattern
You will need:
- Small amount of white yarn in any weight you like (I used worsted and dk; these patterns were designed with those weights in mind)
- Crochet hook, from 2.5mm to 3.5mm (E) or 4mm (G) depending on the yarn you use and how tightly you want to crochet
- Optional thread or ribbon to hang them to a tree - if you don't want to use thread you can make large loop in the snowflake, see below
- needle for weaving in ends
- optional materials for blocking: water, PVA glue and glitter, or spray starch.
Stitches used:
US: ch, sl st, sc, dc mini cluster (see below).
UK: ch, sl st, dc, tr mini cluster.
dc (US)/tr (UK) mini cluster: yarn over, pull up loop, yarn over, pull through 2 loops, yarn over, pull up loop (4 loops on hook), yarn over, pull through 2 loops, yarn over, pull through 3 loops
US Instructions:
Ch 5, join with a sl st to form a ring.
Round 1: *ch3, sc* 6 times
Round 2: sl st into first ch3 loop, sc ch3, *sc into next loop, ch3* five times, join with sl st into first sc.
Round 3: ch3, dc mini cluster in ch3 space, ch3, *sc in sc, ch3, dc mini cluster in ch3 space, ch3,* five times, join with sl st into first stitch.
Round 4: *3sc in chain 3, sc, 3ch, sc in top of dc cluster, 3sc in next ch 3* 6 times. Join with sl st into first sc. Bind off, weave in ends and block.
UK Instructions:
Ch 5, join with a sl st to form a ring.
Round 1: *ch3, dc* 6 times
Round 2: sl st into first ch3 loop, dc ch3, *dc into next loop, ch3* five times, join with sl st into first dc.
Round 3: ch3, tr mini cluster in ch3 space, ch3, *dc in dc, ch3, tr mini cluster in ch3 space, ch3,* five times, join with sl st into first stitch.
Round 4: *3dc in chain 3, dc, 3ch, dc in top of tr cluster, 3dc in next ch 3* 6 times. Join with sl st into first dc. Bind off, weave in ends and block.
Here are photos of each round:
US/UK: For a self loop snowflake: replace a ch5 in Round 4 with ch 20 or ch 25.
Wednesday, 18 November 2015
Free Pattern: Snowflake Wishes 2
Once I start making snowflakes, I really can't stop. I made the larger snowflake of this pair several times, but then one time I got to the the third row and tried something different. So this pattern is two for the price of none, because it's free. I love the original version because it's pretty and lacy...
The original version is around 8.5cm (3.3in) from point to point when made with dk weight yarn (Sirdar Snuggly Pearls) and a 2.75mm (C) hook. It's around 10cm (4in) across with worsted (Lily Sugar'n Cream) and a 3.5mm (E) hook.
I love the second version because it's super fast to make but it's still cute and snowflake-y.
This version is 7cm (2.75in) from point to point when made with dk and a 2.75mm (C) hook, and 8cm (3.1in) across with worsted and a 3.5mm (E) hook.
As always I block all my snowflakes with a mixture of PVA glue, water and glitter to make them stiffer and sparkly. You can read my snowflake blocking instructions.
Pattern
You will need:
- Small amount of white yarn in any weight you like (I used worsted and dk; these patterns were designed with those weights in mind)
- Crochet hook, from 2.5mm to 3.5mm (E) or 4mm (G) depending on the yarn you use and how tightly you want to crochet
- Optional thread or ribbon to hang them to a tree - if you don't want to use thread you can make large loop in the snowflake, see below
- needle for weaving in ends
- optional materials for blocking: water, PVA glue and glitter, or spray starch.
Stitches used:
US: ch, sl st, sc, dc. Optional, chainless starting dc.
UK: ch, sl st, dc, tr. Optional, chainless starting treble (see link above for explanation in US terms).
US Instructions:
Ch6, join with sl st to form loop
Round 1: ch1, sc 12 times into loop, join with sl st to first sc.
Round 2: ch3 (or chainless starting dc), dc in same st, ch3, skip st, (2dcs in next st, ch 3, skip st) 5 times, join last ch3 into 3rd ch of first ch3/starting dc.
Round 3: ch1, sc in next dc, (2sc, ch5, 2sc) in ch3 space, *sc in next two dcs, (2sc, ch5, 2sc) in ch3 space* five times, join with sl st in ch1 at start of round.
Round 4: *ch3, sc in next sc, ch2, skip 2 scs, (sc, 3ch, sc, ch5, sc, 3ch, sc) in ch 5 space, ch2, skip 2 scs, sc in sc* five times, *ch3, sc in next sc, ch2, skip 2 scs, (sc, 3ch, sc, ch5, sc, 3ch, sc) in ch5 space, ch2, sl st into sl st on previous round. Bind off, weave in ends, block.
For the simpler, slightly smaller variation:
Alternate Round 3: ch1, sc in next dc, (sc, ch3, sc, ch5, sc, ch3, sc) in ch space, *sc in next two dcs, sc, ch3, sc, ch5, sc, ch3, sc) in ch space, join with sl st in ch1. Bind off, weave in ends, block.
UK Instructions:
Ch6, join with sl st to form loop
Round 1: ch1, dc 12 times into loop, join with sl st to first dc.
Round 2: ch3 (or chainless starting tr), tr in same st, ch3, skip st, (2trs in next st, ch 3, skip st) 5 times, join last ch3 into 3rd ch of first ch3/starting tr.
Round 3: ch1, dc in next tr, (2dc, ch5, 2dc) in ch3 space, *dc in next two trs, (2dc, ch5, 2dc) in ch3 space* five times, join with sl st in ch1 at start of round.
Round 4: *ch3, dc in next dc, ch2, skip 2 dcs, (dc, 3ch, dc, ch5, dc, 3ch, dc) in ch 5 space, ch2, skip 2 dcs, dc in dc* five times, *ch3, dc in next dc, ch2, skip 2 dcs, (dc, 3ch, dc, ch5, dc, 3ch, dc) in ch5 space, ch2, sl st into sl st on previous round. Bind off, weave in ends, block.
For the simpler, slightly smaller variation:
Alternate Round 3: ch1, dc in next tr, (dc, ch3, dc, ch5, dc, ch3, dc) in ch space, *dc in next two trs, dc, ch3, dc, ch5, dc, ch3, dc) in ch space, join with sl st in ch1. Bind off, weave in ends, block.
Here are some photos of what your snowflake should look like after each round:
Subscribe to:
Comments (Atom)
